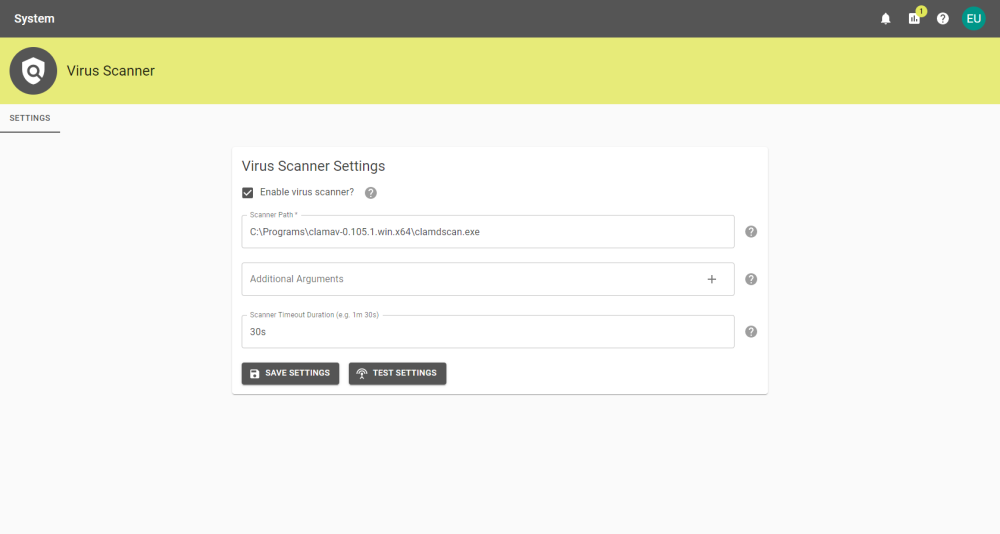
Virus Scanner
The Virus Scanner page can be reached by an Administrator via the Virus Scanner section in the System tab.
Administrators can set the path to the antivirus checker executable to check all uploaded files for threats before allowing submissions to progress to the next stages.
This enables a scanner that will check a file at the point of upload. This includes uploads for submissions, additional files while Adding Specification Information, and any images that are added to projects, suppliers, or user profiles. If any uploaded files fail to pass the scan in a submission, the user will be unable to proceed until the file is removed and/or replaced with a file that passes the scan successfully.
Note: Files that fail the virus scan will not be downloadable and can only be removed or replaced.

|
Setting |
Description |
|---|---|
|
Enable virus scanner? |
This check-box toggles whether the virus scanner is enabled. |
|
Scanner Path |
The file path to the Scanner executable. Currently, only ClamAV (clamdscan) is supported. |
|
Additional Arguments |
Any additional arguments that have been added will be displayed beneath the text box. Individual arguments can be removed by clicking the cross on the argument to be removed. |
|
Scanner Timeout Duration |
Set the time a scan will remain active until it is assumed to be stuck e.g: 1m 5s |
Changes to the settings can be saved by clicking the ![]() button, and tested by using the
button, and tested by using the ![]() button.
button.
Warning: If using ClamAV it is highly recommended that the clamd.config file is updated with the "AlertExceedsMax true" parameter. Files exceeding the values of the "MaxScanSize"
and "MaxFileSize" parameter values will otherwise skip the scanning and report the scan as PASSED.
Please consult the ClamAV documentation regarding maximum file and scan sizes.


