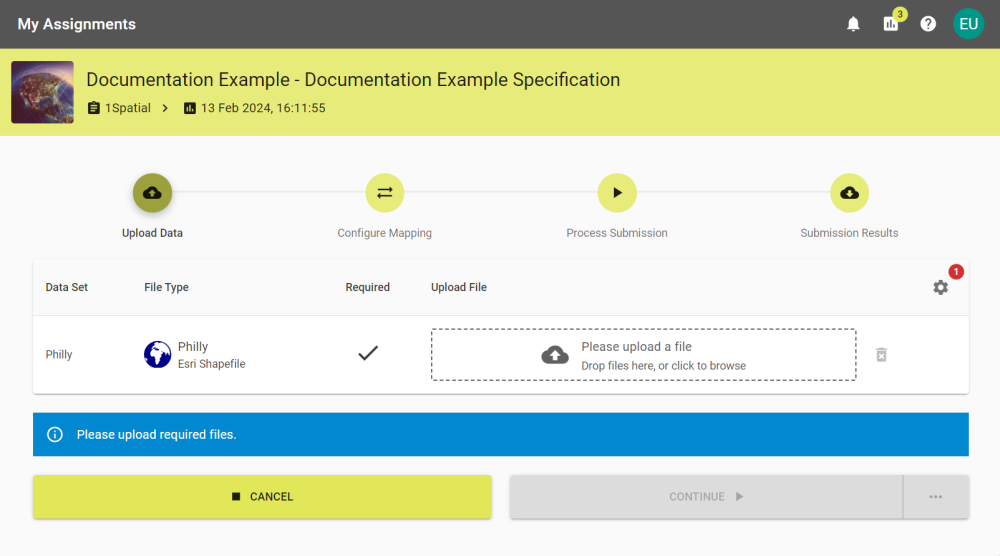
Upload Data
By creating a Submission you are brought to the Upload Data stage. The Submission remains open for the period configured in the project's settings but you can leave this page and return to it via the My Assignments tab at any point.
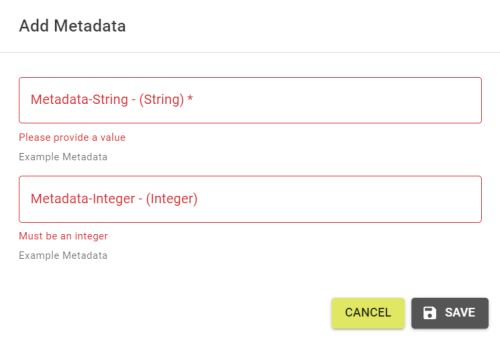
Metadata
If a Submission is configured to accept Metadata, the Metadata button ![]() appears. If there are any required fields it displays the number of fields that need to be completed.
appears. If there are any required fields it displays the number of fields that need to be completed.
Note: The number does not include optional Metadata, so Users need to manually check for it if no number is shown.
Click the button to open the Add Metadata panel, and enter and save the required Metadata.
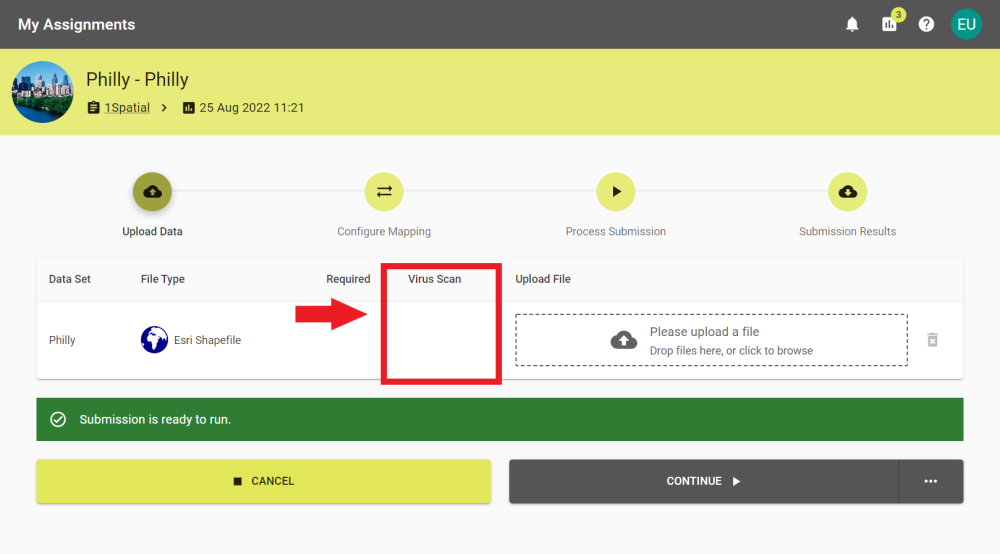
Virus Scanner
If a Virus Scanner is enabled then there is also a column for the state of the virus scanner. If enabled, you are only able to proceed when all uploaded data has passed the check successfully. The scan begins shortly after the file upload has completed.
|
Virus Scan State |
Description |
|---|---|
|
|
Pending - During this state the virus scanner is expected to be scanning the uploaded file. It remains in this state until it finishes or until the Timeout period set by a User with the System Manager Role has passed. |
|
|
Error - The scanner has encountered an error or timed out. Contact Users with the Project Manager Role if the error isn't fixed by reuploading the data. |
|
|
OK - The scanner hasn't found any threats in the data. |
|
|
Threat Found - The scanner has identified a threat within the data. When a threat is found the data is no longer downloadable from the results screen if the Submission is cancelled. Note: Once a threat is found, the file can only be replaced or deleted. |
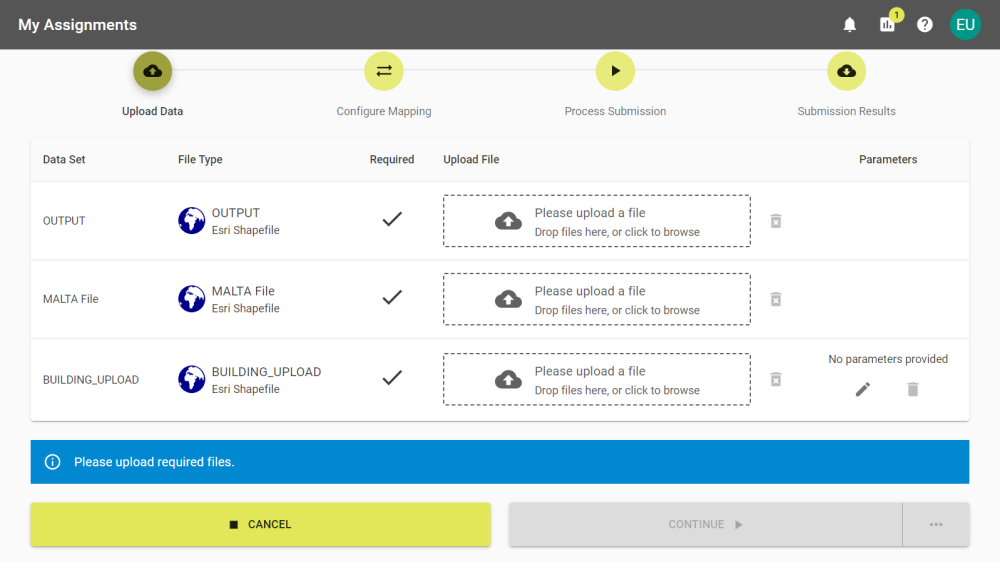
Multiple Upload Files
If there are multiple files that can be uploaded, any that are required need to be uploaded before the submission can continue.
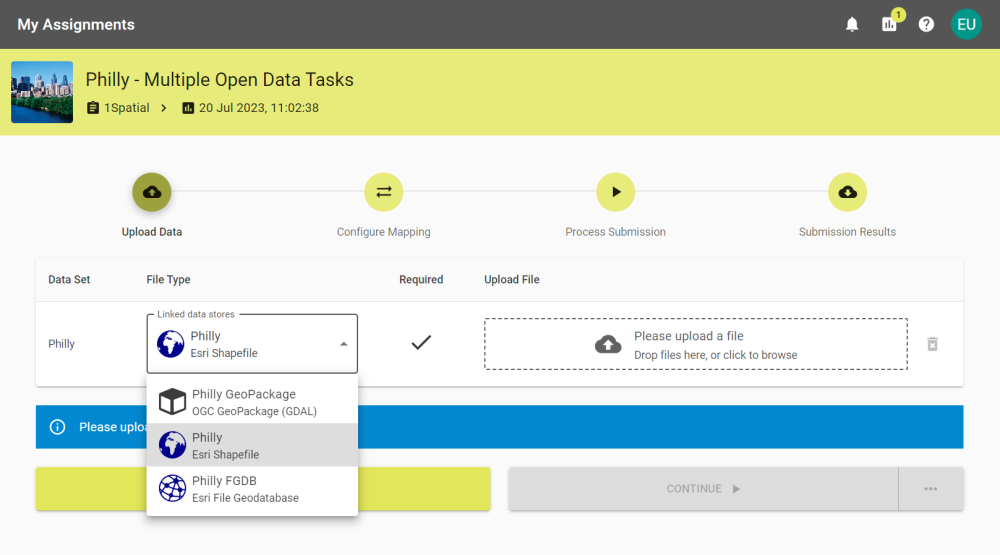
Data Store Choice
If there are multiple Data Stores to choose from for a single upload you can click the dropdown and choose the required file type.
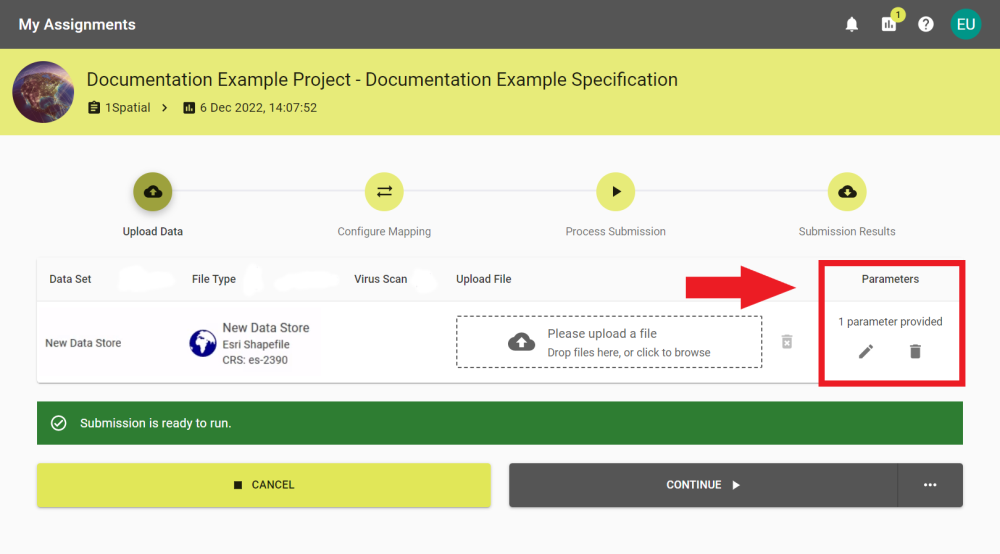
Parameters
If the specification allows users to configure parameters, the parameters can be edited or cleared using the Edit button ![]() and the Clear Parameters button
and the Clear Parameters button ![]() .
.
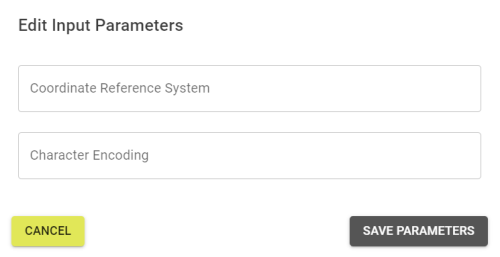
If the 1Integrate Session contains parameters, editing the parameter in 1Data Gateway overrides it.
Note: If a Data Set has a Coordinate Reference System configured, it is displayed under the File Type.
Note: Information on parameters can be found for the respective Data Stores in the 1Integrate documentation.
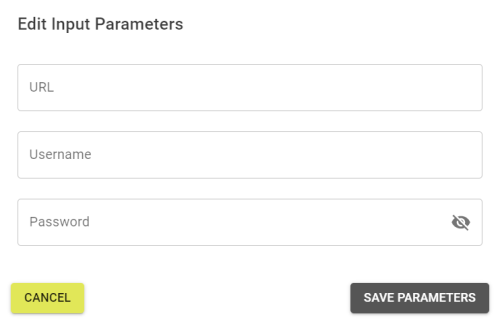
When connecting to external Data Stores, parameters such as the URL, Username, and Password can be entered via the parameters panel.
-
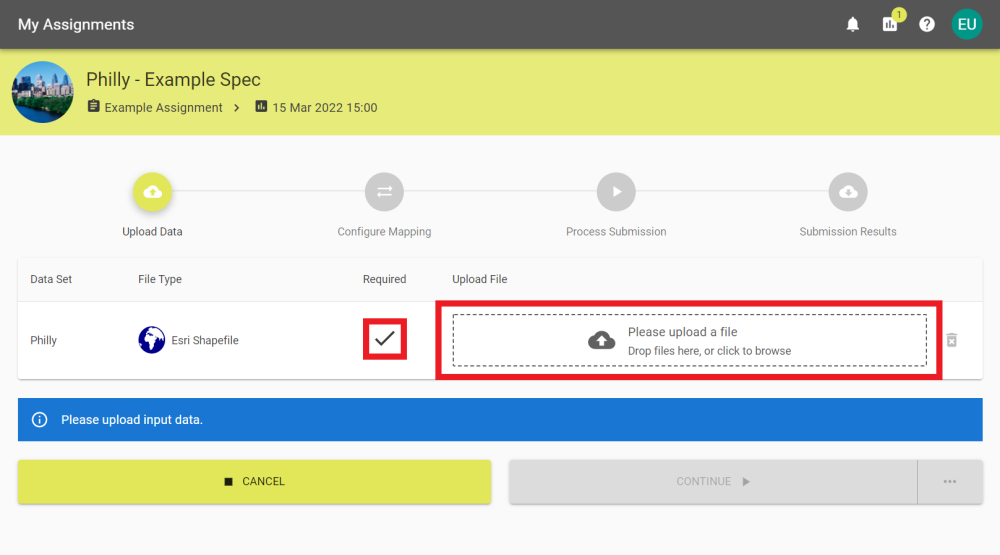
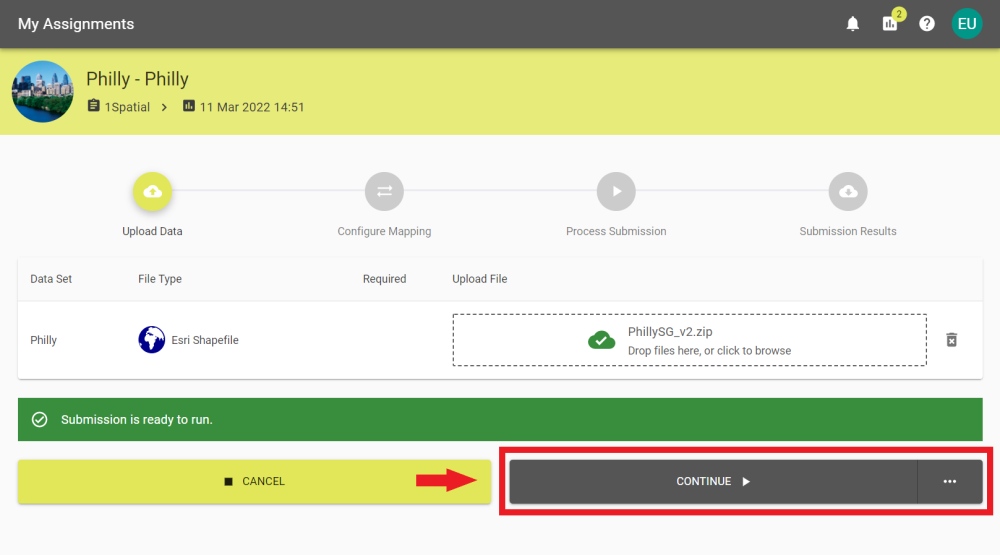
If a Submission requires data to be uploaded there is a tick under the required heading. You need to add data for each required Data Set for the Submission. You can drag and drop your desired files to the upload box or click to open the file system browser and select it from there.
-
Once the file has finished uploading it is displayed in the upload box.
-
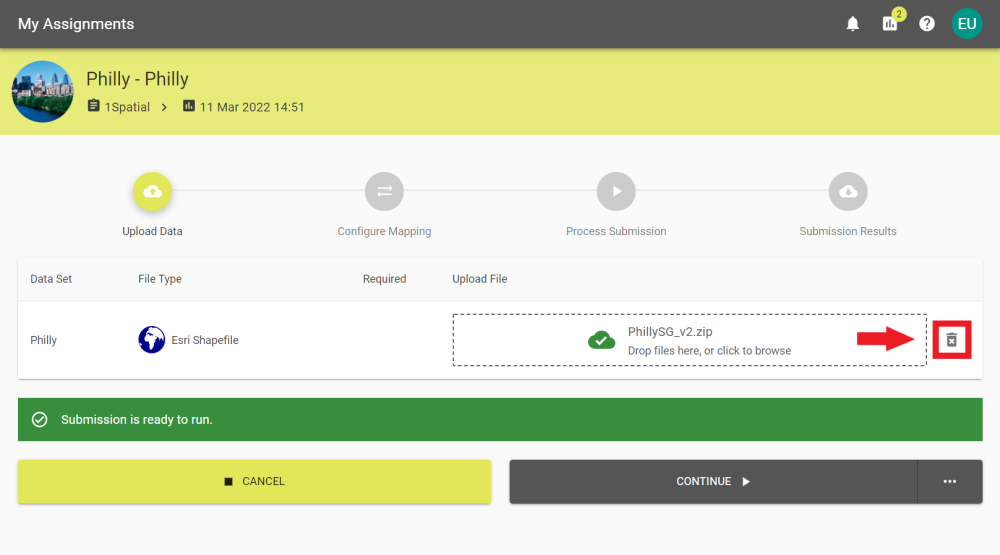
If you need to remove a selected file, then you can remove it by clicking the Delete button
 and confirming the removal.
 -
Select Continue to proceed to Configure Mapping. Alternatively, select the ellipsis on the right side of the button to open the automation / notification options.
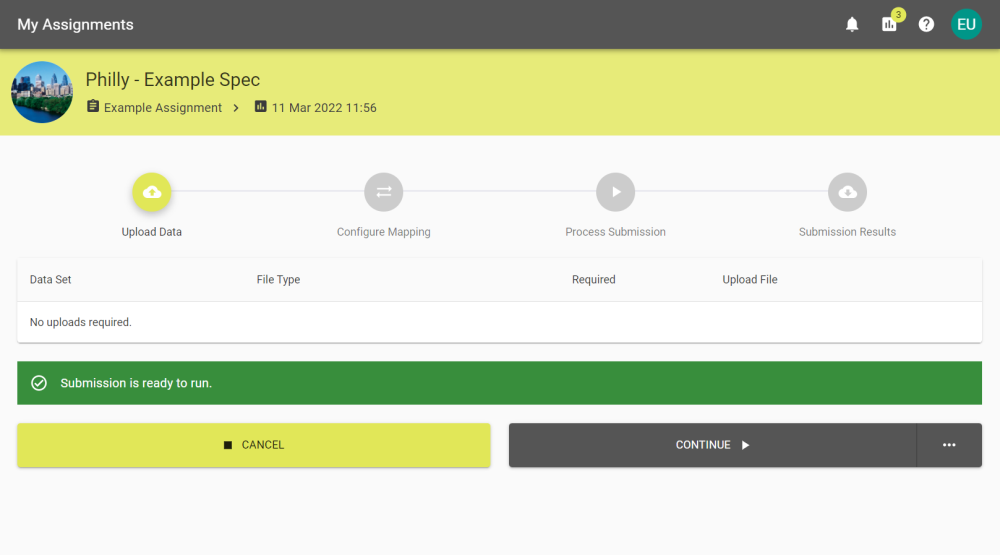
Note: Submissions that don't require data to be uploaded already have data configured by Users with the Project Manager Role. In this case skip to step 4.
Make sure that the file type of the data you upload is what is expected by the Data Set.
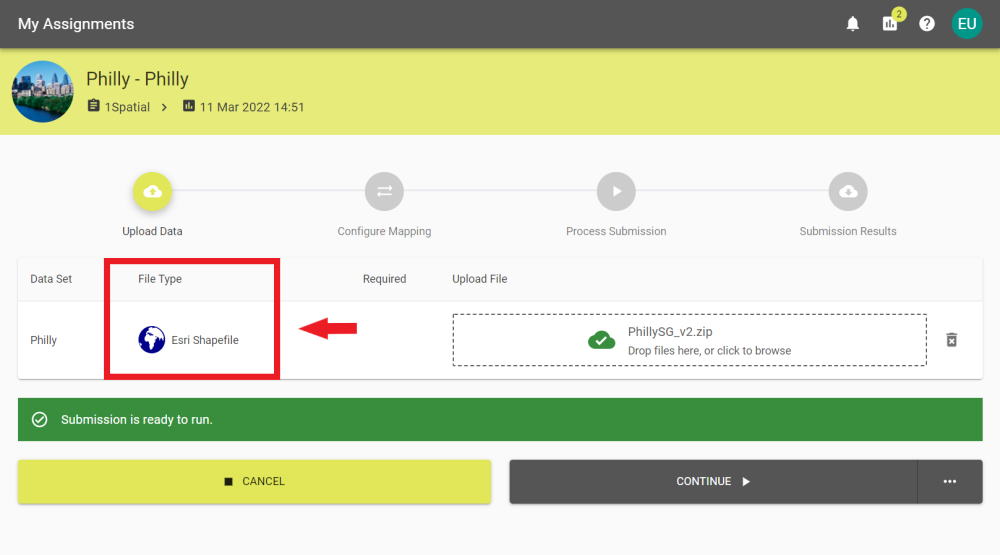
If all the files are correct the Please upload input data banner changes to the Submission is ready to run banner.
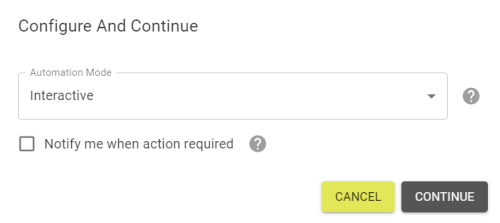
Select an option and click Continue to proceed with the chosen Automation Mode.
|
Automation |
Description |
|---|---|
|
Interactive |
The user is required to continue at each step. |
|
Until processing complete |
The Submission continues automatically until the processing is complete. |
|
Until finished |
The Submission continues automatically until it reaches the results stage. |
|
Until finished & closed |
The Submission runs to completion and close automatically. |
The Notify me when action required check-box sends a notification within 1Data Gateway and send a preconfigured email to the user's email when the automation reaches the stage set above.
Note: If Schema Mapping is required then the Submission halts at Schema Mapping regardless of the chosen automation mode. Users are sent a notification that the Submission requires user input.
This does not apply to Submissions started via the API.
Note: For more information, see Notifications.


