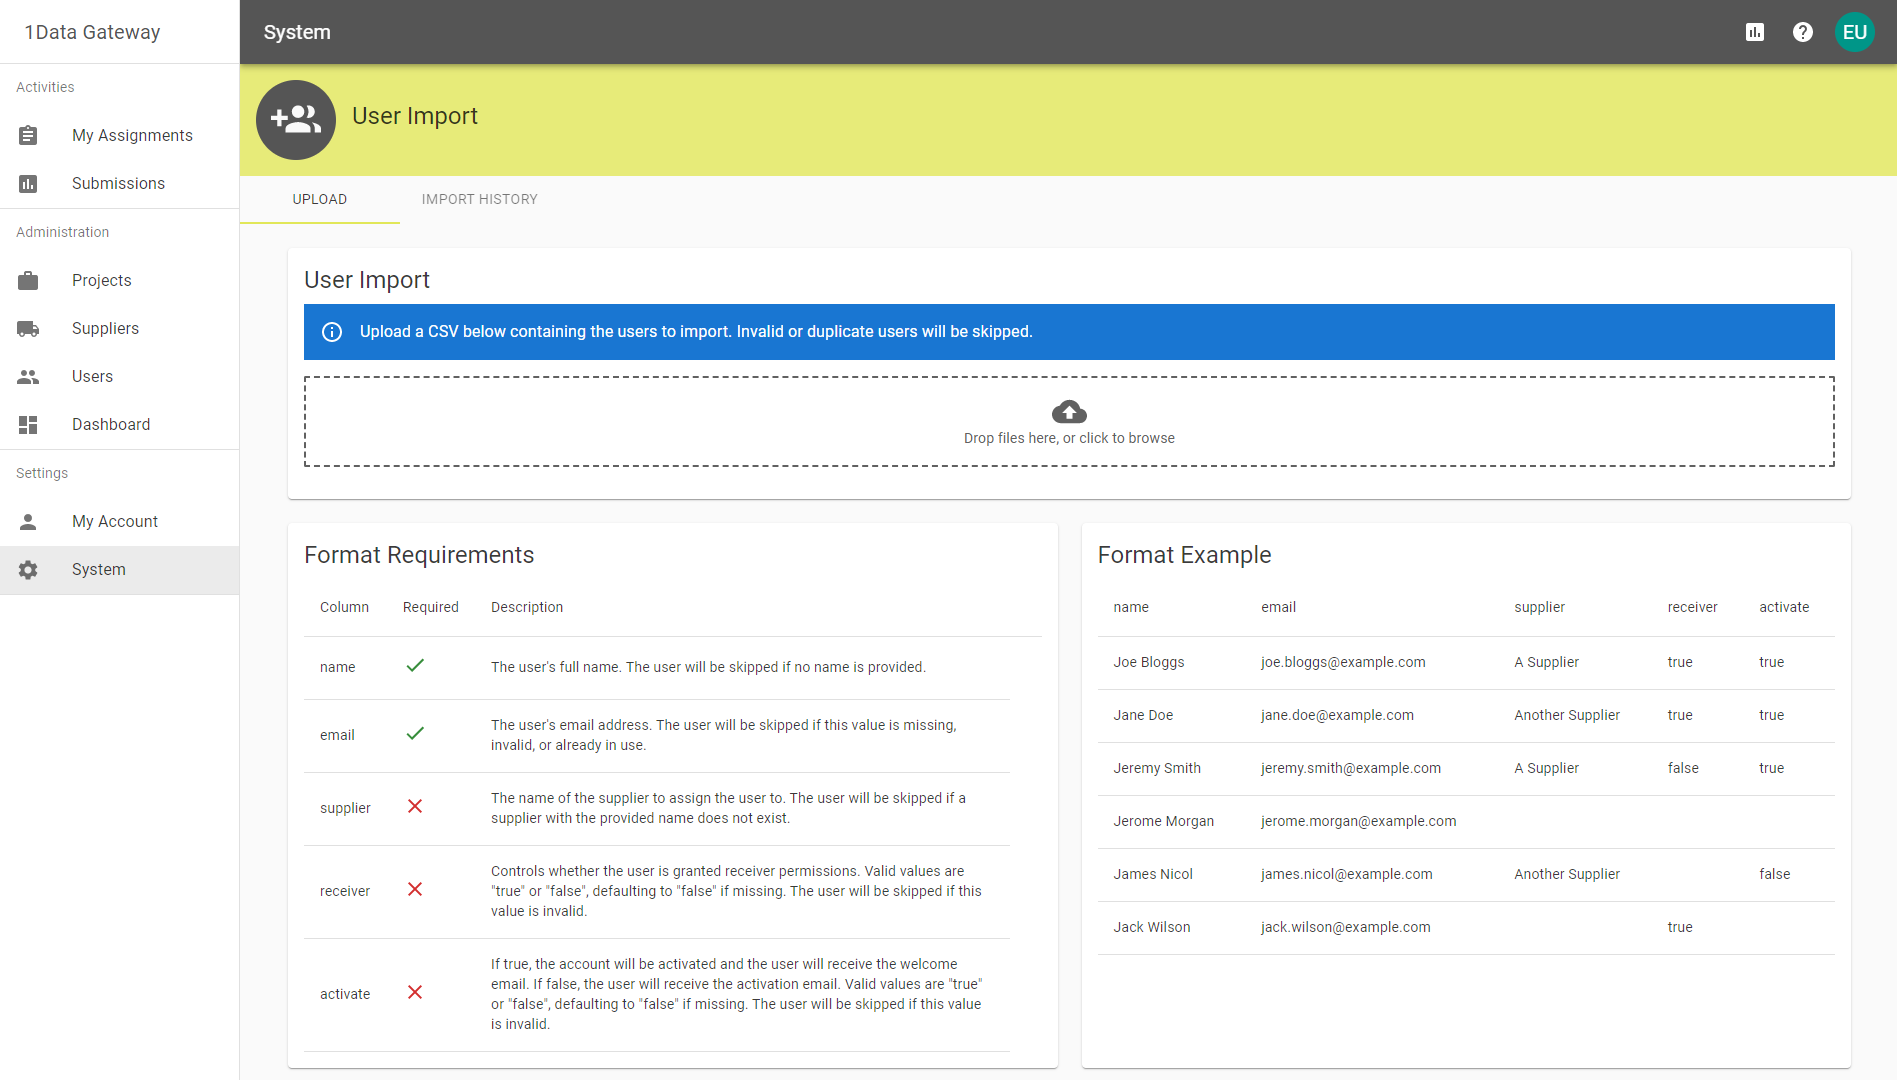
User Import
It is possible to import multiple users at once by uploading a CSV file. To add individuals, check Users.
 Prerequisites
In order to import the users you will need to define the .csv file correctly.
There are five columns that can be defined with only name and email being required:
| Column | Required | Description |
|---|---|---|
| name | Yes |
The user's full name. Note: The user will be skipped if no name is applied. |
| Yes |
The user's email address. Note: The user will be skipped if this value is missing, invalid, or already in use. |
|
| supplier | No |
The name of the supplier to assign the user to. As this is optional it can be left blank. Note: The user will be skipped if the given supplier name does not exist. |
| receiver | No |
Controls whether the user is granted receiver permissions. Valid inputs are "true" or "false" and defaults to "false" if it is missing. Note: The user will be skipped if this value is invalid. |
| activate | No |
If true, the account will be activated and the user will receive the welcome email. If false, the user will receive the activation email. Valid values are "true" or "false", defaulting to "false" if missing. Note: The user will be skipped if this value is invalid. |
Upload
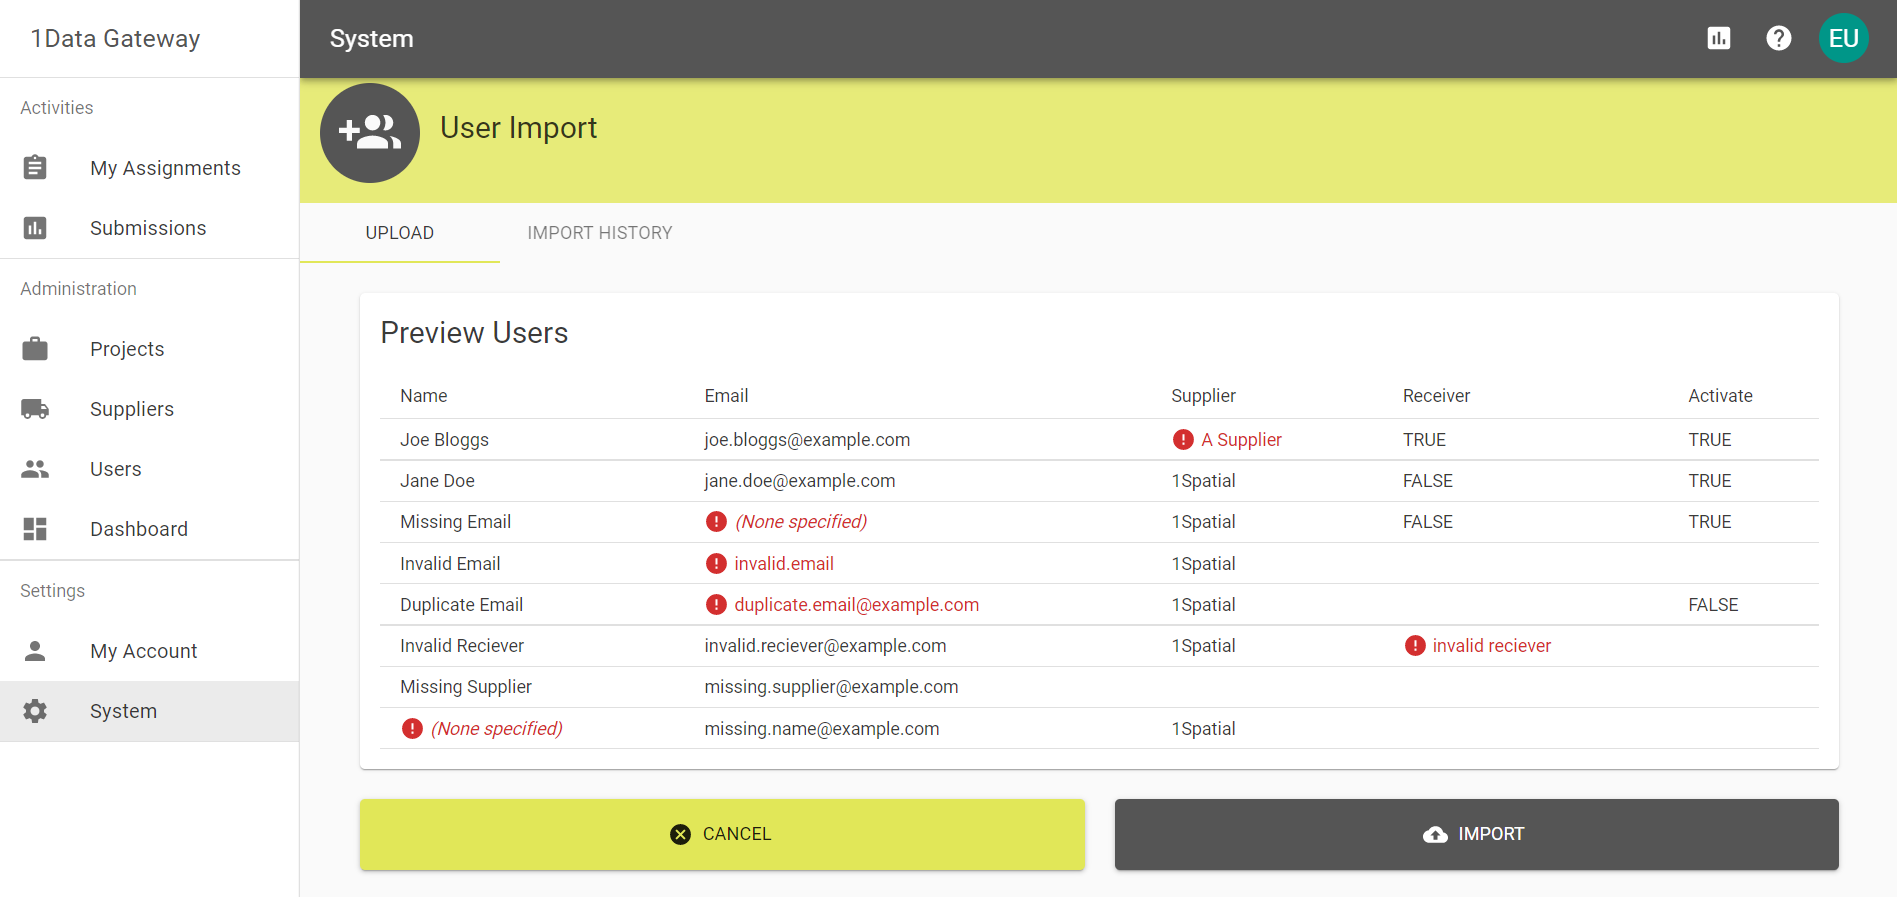
Within the Upload tab you have the option to drag and drop a file to import, or select it using file explorer.
Dropping or selecting the file will upload and preview up to 100 of the imported users. Invalid details will be shown in red pointing out the error. Click the ![]() button to finalise the import.
button to finalise the import.
Import History
Once a file is uploaded it will be shown in the Import History tab, even if the process wasn't completed.
From here, imports can be cancelled or have their state monitored.