Create a Rule
Rules are about validating data. Most workflows will contain at least one Rule that will validate the data from a Data Store. Rules (and Actions) are best suited to focusing on a single set of conditions, rather than trying to complete all data validation in a single Rule.
-
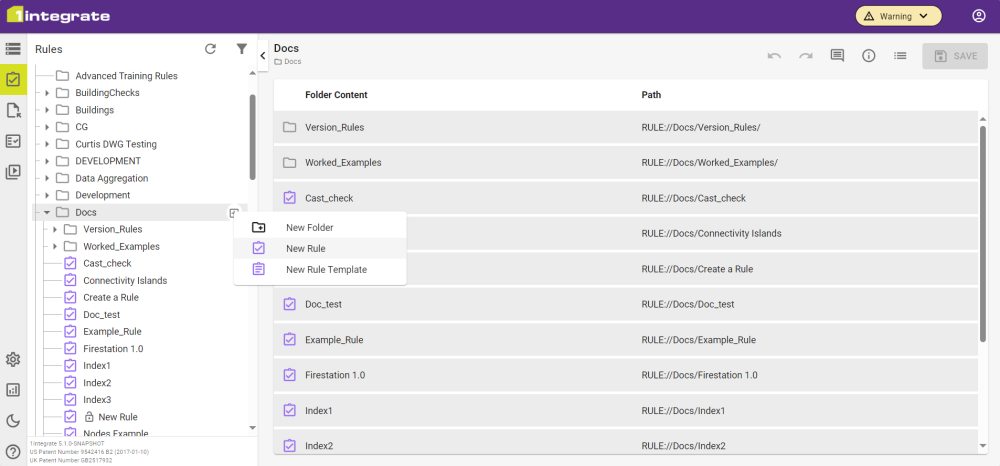
In the folder structure on the Rules tab, click the Add button
 and name your Rule.
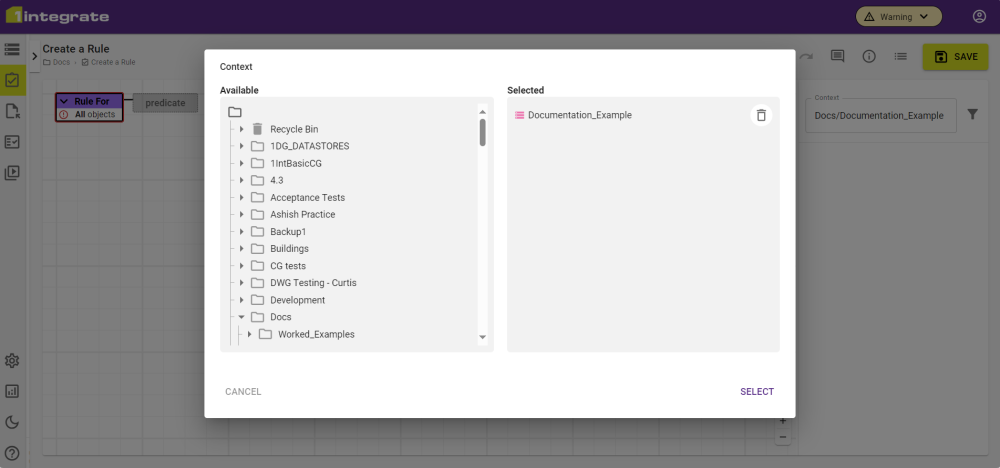
As the Data Store has been set up, it can be connected to the Rule via the Context at the top of the Right Hand Panel. This links the data in the Data Store to the Rule, allowing the classes and attributes within the data to be referenced.
-
Click the Context to open the Data Store selection and choose the Data Store that you created.
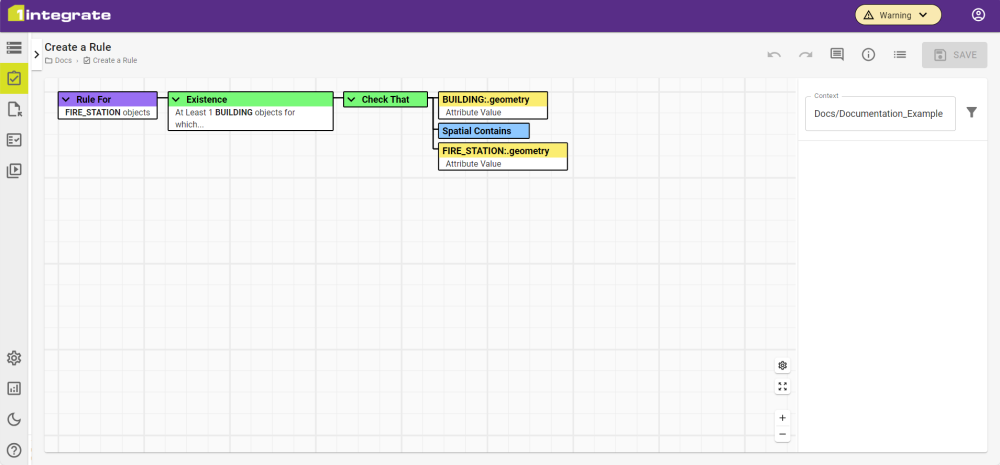
Each Rule is built up from a series of logic nodes that branch out horizontally from left to right. These nodes are the visual blocks of code logic that 1Integrate utilises. Having any coding experience should make Rule (and Action) building feel familiar.
By default the purple, Root node designates what objects the Rule is built for. It helps to specify what object is the focus if there is one as it will restrict processing only to that object and any others referenced in the Rule itself. This means fewer objects to process, which often means less time spent processing the Rule.
-
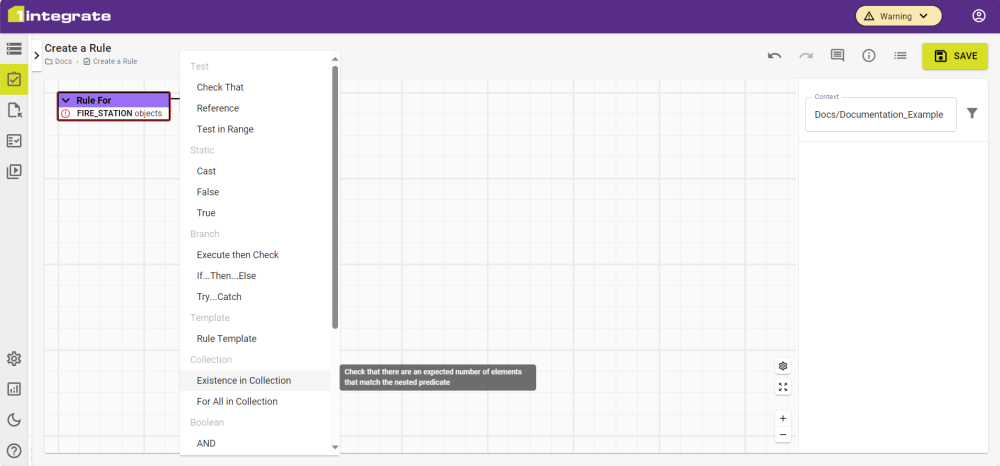
Click the Root node and select the Class you want to run the logic against.

Each node that is available has to be of a certain type: a Predicate which defines the type of check, a Relation which evaluates two Values, or a Value of a particular attribute. Clicking on a node displays the options for that node, allowing the Rule to be built up quickly using only "correct" logic.
-
Add nodes to create the logic that you want from the Rule until all the required nodes and optional nodes that you need are filled in.
-
Click the Save button in the top right of the screen. This Rule is then ready for use with Actions or as a standalone Rule within a Session.