Before you create a job, ensure a profile has already been created (see Managing Profiles).
Viewing Jobs
After a job has run successfully, you can view the data in the map viewer. Click ![]() next to the job name to open the map viewer.
next to the job name to open the map viewer.
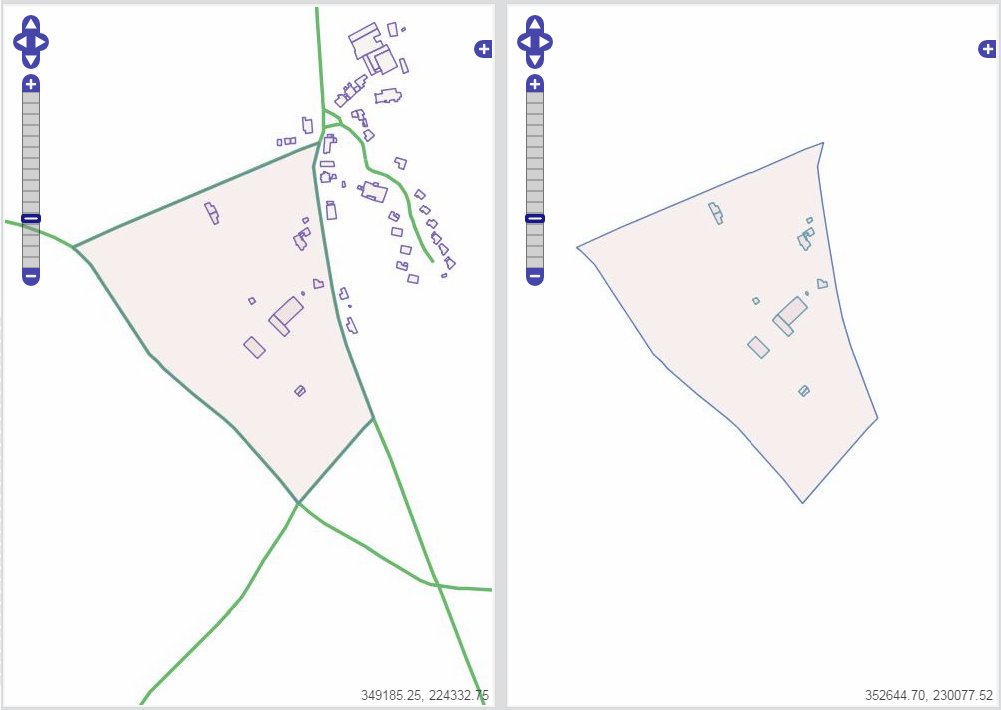
The map on the left displays the source data and the map on the right displays the target area that will be generalised.
Using the Map Viewer
Use + and - to zoom in and out of the map, and use the arrows to pan.
Click  to view any step in the generalisation process. The map is automatically updated to display the selected state.
To compare steps, select each step you want to compare in the left and right map viewers. This can be helpful, for example, to visualise the "before and after" data of a particular step.
Viewing Job Information
To review statistical information about a completed job, select a job in the Recent Jobs list and click ![]() .
.
A page with timing statistics for all the steps run during that job and step details is displayed.
Monitoring Job Statuses
To monitor jobs as they are running, click on the job's name in the Recent Jobs list
and click ![]() . A panel containing the status of all the steps the job has to complete
is displayed.
. A panel containing the status of all the steps the job has to complete
is displayed.
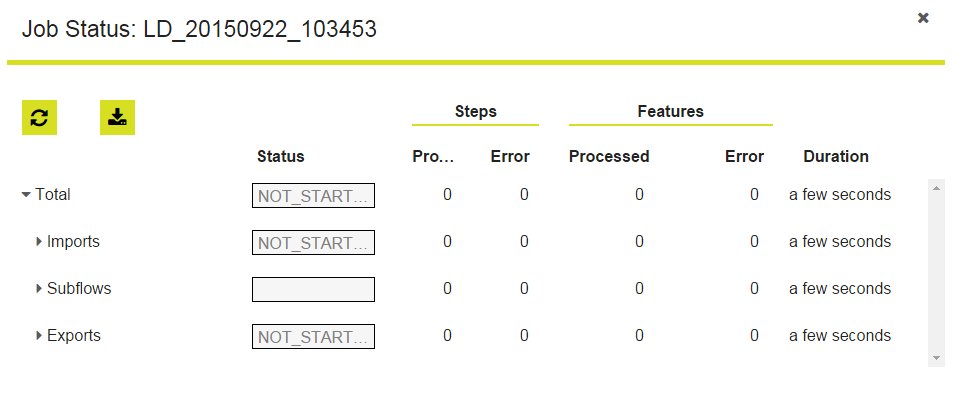
Job Status Panel
Each step has a status bar, the number of steps and features processed, the number of errors encountered, and the duration of the time taken to complete each step.
- To refresh the information, click
 .
. - To download a .csv file of the status information, click
 .
.
Viewing Job Errors
Jobs containing errors have a ![]() next to the job name in the Recent Jobs list.
next to the job name in the Recent Jobs list.
To
view information about the error, select the job and click ![]() . A summary page listing
all error information is displayed.
. A summary page listing
all error information is displayed.
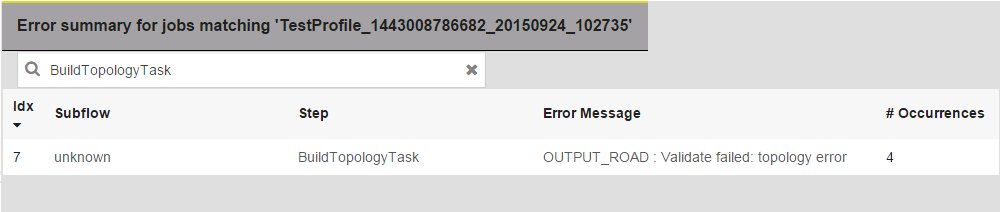
Error Summary
On this page, the number of occurrences of the error is shown. To view each occurrence in more detail, click the error message. A page shows the error message, stack trace information, and the instances sorted by class and job.

Download error details
In the Job Name area, the error details for each job can be downloaded as an XML file by clicking ![]() .
.