Works Area
To draw a Works Area, click the Add Works Area button ![]() in either the Works Area section of the Create Plan panel or the Toolbar.
in either the Works Area section of the Create Plan panel or the Toolbar.
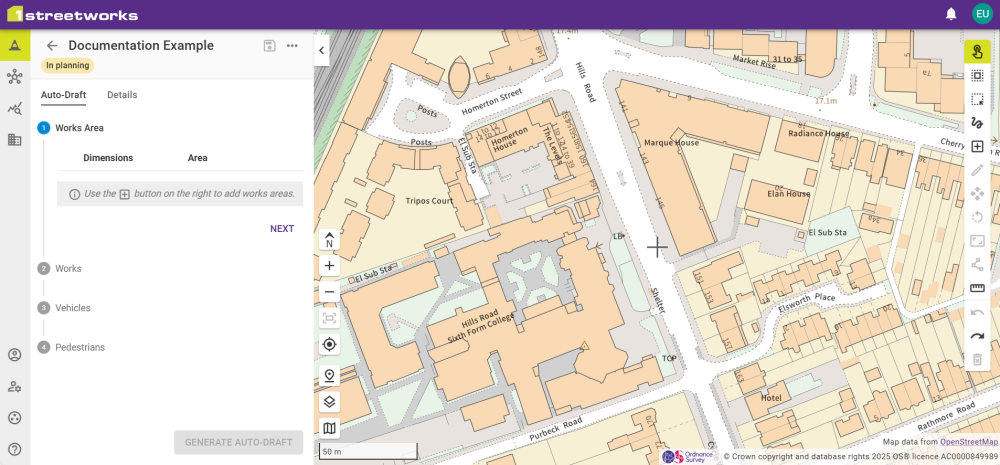
This expands the works area creation menu with the following options.
|
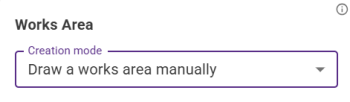
Creation Mode |
Description |
|---|---|
|
This allows you to draw a Works Area on the map by clicking two points and moving the mouse to extend the area out to create a Works Area. |
|
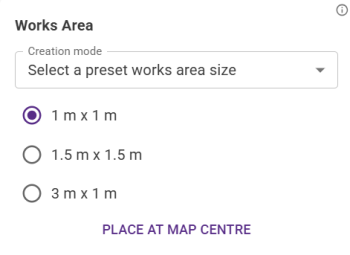
There are three preset works area sizes. Click the map and a Works Area of those dimensions is placed with its centre at the point clicked. Place at Map Centre draws the Works Area at the position of the Crosshair position. Note: These are always created with a bearing of 0 degrees. |
|
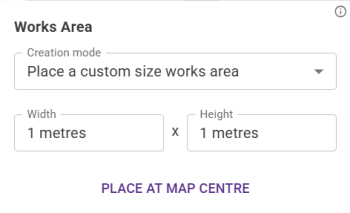
You can also define the dimensions of the Works Area and click on a point on the map, creating the Works Area with that point as its centre. Place at Map Centre draws the Works Area at the position of the Crosshair position. |
Once a Works Area is created the toolbar on the right can be used to edit the dimensions or move it.
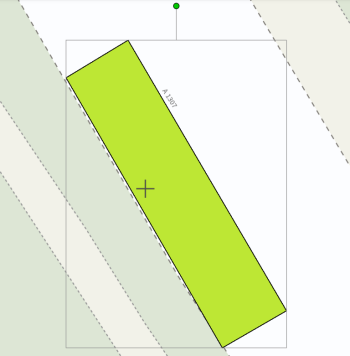
Each tool interacts with an object in a different way. For example, the rotate tool rotates a works area by dragging the "antenna" of the boundary box:
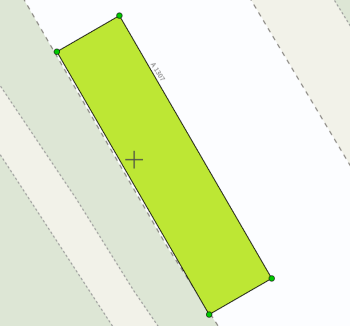
When editing a Works Area, you can drag an existing point to change the shape or pull an edge when a green dot appears along an edge to add another point.
Any alterations to the dimensions and area of the Works Area is updated in the Auto-draft panel. You can centre the map on a Works Area by selecting the locate icon or delete a Works Area with the bin icon.
The next steps are to complete the rest of the questions in the Create Plan Wizard.
Toolbar
|
Tool |
Shortcut |
Description |
|---|---|---|
|
|
Esc |
Select an individual work area. |
|
|
Ctrl+A |
Select all work areas. |
|
|
F |
Select multiple work areas by dragging a selection box on the map. |
|
|
L |
Select multiple work areas by clicking and dragging to "paint" an area between the initial point and your mouse cursor. |
|
|
A |
Add a new works area. Note: These are always created with a bearing of 0 degrees. The Works Area can be subsequently edited and/or rotated - see below. |
|
|
E |
Edit selected works area. |
|
|
M |
Move selected works area. |
|
|
R |
Rotate selected works area. |
|
|
S |
Scale selected works area. |
|
|
D |
Drag the selected works area edge. |
|
|
U |
A linear measure tool for digitizing a line and displaying the length in metres. |
|
|
Ctrl+Z |
Undo the last action(s). |
|
|
Ctrl+Y |
Redo the last action(s). |
|
|
Del |
Delete the selected works area(s). |
|
Copy |
Ctrl+C / Ctrl+X |
Copies the selected works area(s). |
|
Paste |
Ctrl+V |
Pastes a copy of the selected works area(s). |
|
Multi-Select |
Shift+Click |
Select Multiple objects by clicking on features while holding shift. |
 minute read