Create Plan Wizard
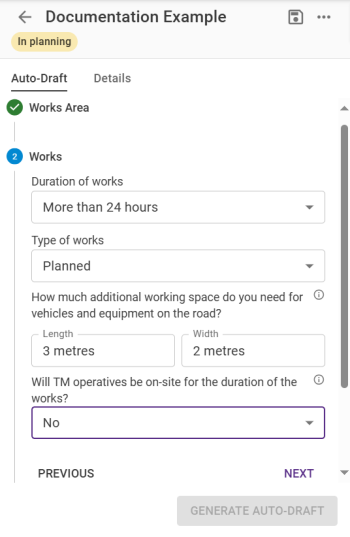
After creating the Works Area the Create Plan Wizard continues with the Works questions.
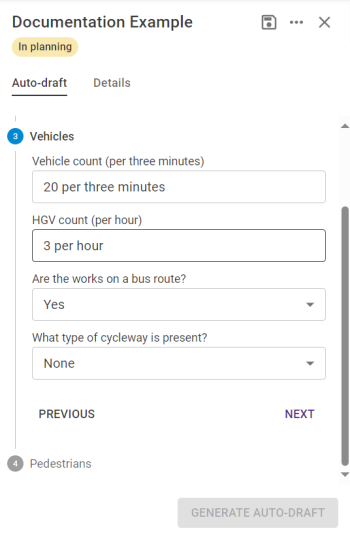
Vehicles questions relate to your traffic survey and non-pedestrian traffic.
Finally, pedestrian information needs to be entered.
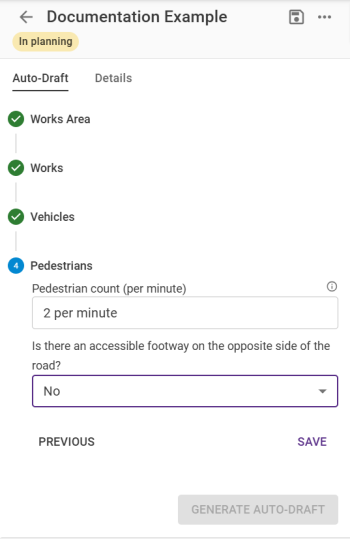
Steps don't need to be completed sequentially. Completed steps will be marked by a green check icon, the active step will be marked blue, and an orange exclamation icon marks any steps that are missing information. "Untouched" steps are marked in grey.
To delete a plan you’ve started creating, you can select the ellipsis in the top right of the panel and select Delete plan.
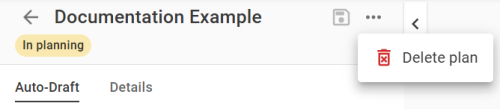
Confirm deletion with Delete Plan or cancel deletion by clicking Back.
When all five steps are marked as complete, click Generate Auto-draft in the bottom right of the panel to begin generation.
The answers you submitted are referenced against the rules logic and 1Streetworks's Auto-draft process begins to generate a draft plan. The generation can be tracked via the progress indicator.
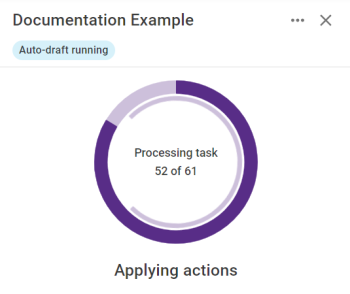
It typically takes under a minute to generate the Auto-draft.
Successful plans show the automatically produced traffic management plan on the map, and the Plan tab contains a list of all the features. Clicking the Locate on Map button ![]() next to a feature centres the map on it, while clicking the Hide Feature button
next to a feature centres the map on it, while clicking the Hide Feature button ![]() will toggle hiding that feature on the map.
will toggle hiding that feature on the map.
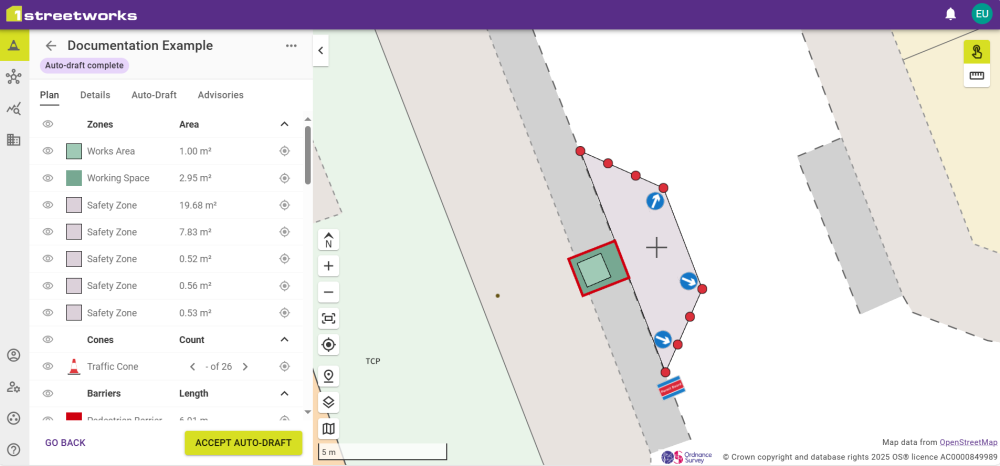
You can also display fewer features in the list using the expand/collapse arrows for each category of feature.
The signs and traffic signals are presented in whichever view mode you have selected, the image above shows the plan in Flat view. The bottom of each sign or signal is the “placement point” used to attach the feature to the correct location on the ground. Each is oriented according to the bearing that the Auto-draft logic assigned it based on the underlying Ordnance Survey data. If a sign has a supplementary plate, its base is the “placement point” for the entire sign. In Flat mode, red dots show placement points of traffic cones.
Perspective view orientates features to always face you, even when the map is panned in 3D view. The direction that each feature faces on the ground is shown by the arrow on the circular axis.
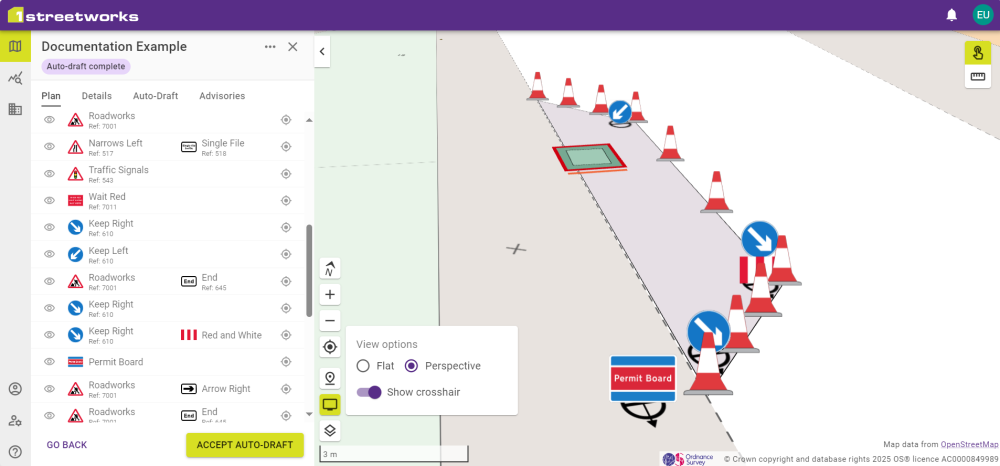
In Perspective view, the red dots used to denote traffic cones are replaced with cone symbols.
The Details tab shows the information given when creating the initial plan boundaries. These can be edited by clicking the Edit Plan Details button .
The Auto-Draft tab contains all of the Create Plan Wizard questions and answers.
The Advisories tab lists any advisories raised by the generation of the plan. This includes advisories on implementing controlled pedestrian crossings, diversions, etc. If no advisories have been raised, the tab states that none were raised.
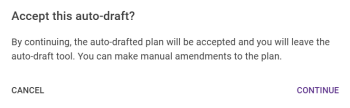
To edit the answers or change the Works Area, select Go Back. You are then asked to confirm this.
If you confirm, all the features added to the plan disappear but the Works Area(s) will remain untouched.
If you are happy with the Auto-draft, click Accept and then confirm after checking the box to agree to the terms and cost of the plan. This allows PDFs to be generated or further changes to be added/made by Editing Plans.
Once accepted, the status changes to Auto-draft complete and you can review the plan details in the panel's Details, Plan, Signals, Road, Diversions, Signs, PDF, History, Information and Advisories tabs.
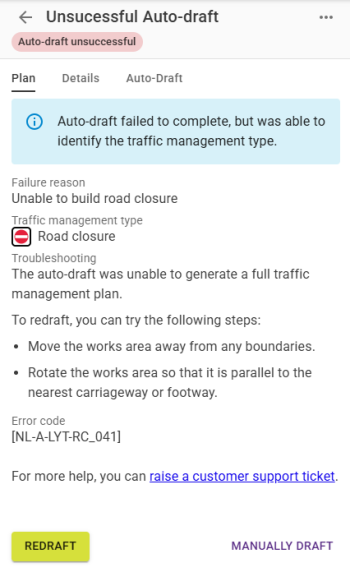
Auto-draft Unsuccessful
Plans that cannot be automatically generated for the location and inputs you’ve specified, give a notification and a code based on the automation step that was unable to complete successfully.
This code can be given to Support to help identify the reason that a plan cannot be successfully generated and whether further refinement in the automation process is required in the future.
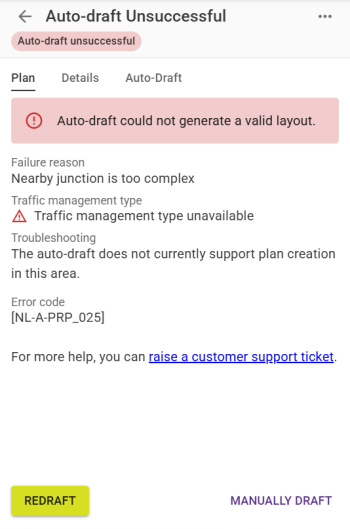
The plan can still be created by clicking Manually Draft, allowing the plan to be manually corrected, or click Redraft to make changes and regenerate the Auto-draft.
The Troubleshooting section of the Plan tab will give advice on how to generate a Plan if the traffic management type is supported. If this continues to be an issue see Raising Support Tickets on how to contact support.
 minute read