Editing Plans
Accepted Plans can be edited in multiple ways. The draft plan can be edited to change the Works Area or details from the Create Plan Wizard. Road Features such as speed limits and road markings can be added to the map, Diversions and Closures can be created, Signals and their cycles can be added, and Custom Signs can be designed and used.
Editing the Draft Plan
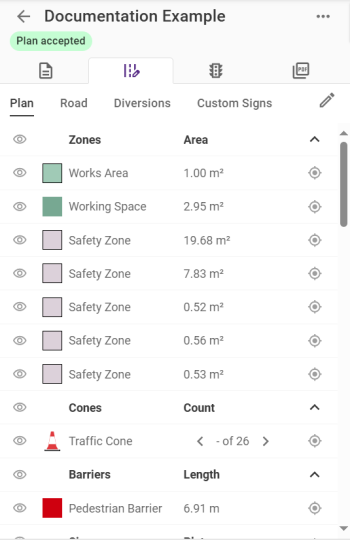
Accepted Drafts and Manually created plans can be adjusted by editing them from the Plan section of the Plan Design tab.
Click the Edit button ![]() and the confirmation dialog appears.
and the confirmation dialog appears.
Note: By confirming to edit the plan, you agree to 1Streetworks being unable to undertake any subsequent automated compliance checks for any edits you make.
Confirming this enters the editing mode.
Adding a new feature uses the following feature palette.

Features that can represent different options, like signs, the different types are available to be chosen from the properties, as listed below.
|
Feature |
Description |
|---|---|
|
Cone |
Traffic cones and No Parking cones. With the option of placing single cones, or cone runs with maximum spacing. |
|
Sign |
Signs, and Supplementary Plates. |
|
Custom Sign |
|
|
Asset |
Stop/Go Boards, Traffic Signals, Pedestrian Traffic Signals, Portable VMS. |
|
Barrier |
Traffic Barrier, Pedestrian Barrier, Metal Barrier. |
|
Ramp |
Pedestrian Ramp. |
|
Area |
Works Area, Working Space, Safety Zone, Walkway. |
|
TM Template |
Controlled Crossing, Guide Island, Road Closed Assess Only, Safety Zone, and Traffic Lights Approach Signage. |
Selecting a feature allows the type and any properties to be configured.
For feature types that have a direction, such as signs and traffic signals, the bearing is set after the feature is placed. Click once to place the feature, the feature will then rotate in place, following the mouse, until clicked a second time to set the bearing.
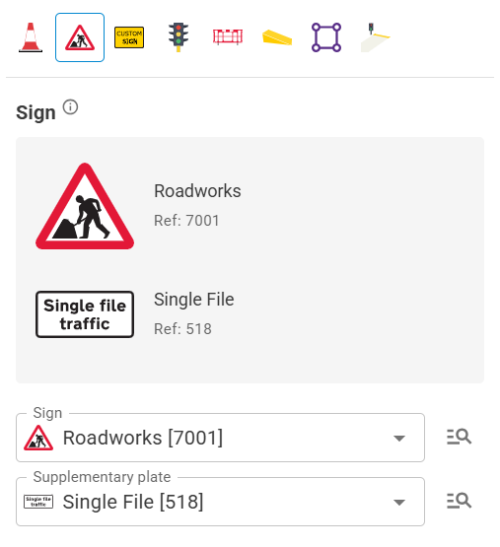
The Sign feature palette includes a preview of the sign based on the Sign and supplementary plate.
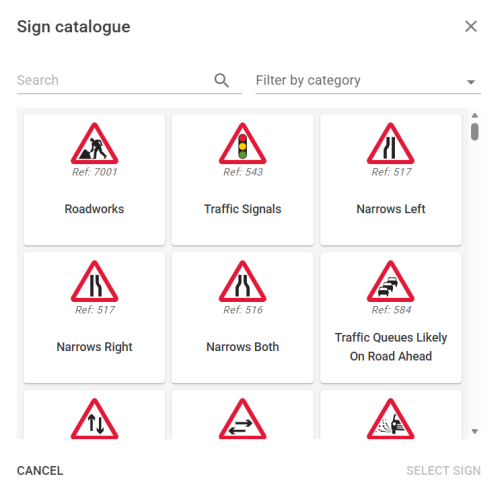
The Sign Catalogue button ![]() opens the Sign catalogue.
opens the Sign catalogue.
Signs can be filtered through the search, matching the name or reference number, and by category. After choosing a sign, click Select Sign to add a sign.
In Perspective view, the bearing is shown as a directional arrow pointing beneath the feature.
If you want to cancel your changes, click Cancel in the Editing panel.

You will then be asked to confirm this by clicking Discard Changes.
To save your changes, click Save Changes in the Editing panel.
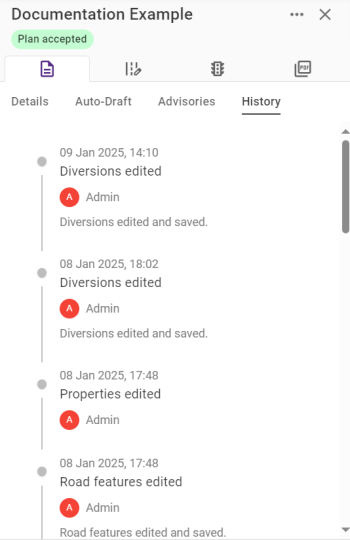
When saving any changes in an accepted Plan, a popup appears to confirm changes and requesting a comment to describe the changes. If no comment is added, the default text for that feature/section will be used e.g. "Diversions edited and saved."
Any saved changes are added to the History section in the Plan Information tab alongside your comment.
TM Features
|
TM Type |
Description |
|---|---|
|
Controlled Crossing |
Click on one side of the street to place one side, click parallel to this on the opposite side of the road to place the initial point. Drag the crossing until it is the necessary width and click to confirm placement. This will include the ramps and signals automatically. 
|
|
Guide Island |
Click to place an initial point, the guide island will then face the mouse cursor and scale based on the cursor distance from the initial point. When the bearing and size is correct, click to confirm placement. 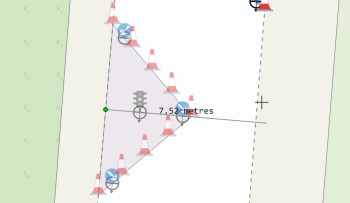
|
|
Road Closed Access Only |
Click on the side of the road which would contain oncoming traffic to place the first point. Place the second point on the opposite side to add closure signs and cones. Subsequent points must be added along the curve of the road until the leading Road Ahead Closed and roadworks signage has been placed. Double-click to confirm placement. 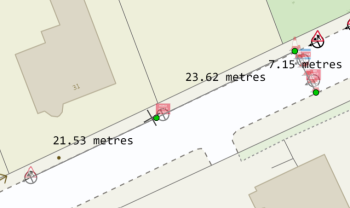
|
|
Safety Zone |
Click on one side of the road to place the first point, then click on the opposite side to begin placement. Drag the area to the desired size and click to place the final point. 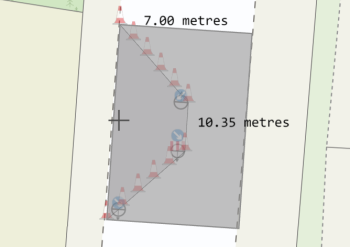
Note: The longest edge connected to the first point will be where the safety zone extrudes from. |
|
Traffic Lights Approach Signage |
Click to place the first point. Subsequent points can be added to follow the curvature of the road with the correct distance between signs. Double-click to confirm placement. 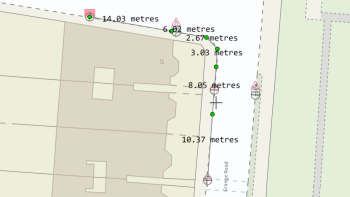
|
Toolbar
|
Tool |
Shortcut |
Description |
|---|---|---|
|
|
Esc |
Select an individual plan feature. |
|
|
Ctrl+A |
Select all plan features. |
|
|
F |
Select multiple plan features by dragging a selection box on the map. |
|
|
L |
Select multiple features by clicking and dragging to "paint" an area between the initial point and your mouse cursor. |
|
|
A |
Add a new feature. |
|
|
E |
Edit selected feature(s). |
|
|
M |
Move selected feature(s). |
|
|
R |
Rotate selected feature(s). |
|
|
S |
Scale selected feature(s). |
|
|
U |
A linear measure tool for digitizing a line and displaying the length in metres. |
|
|
Ctrl+Z |
Undo the last action(s). |
|
|
Ctrl+Y |
Redo the last action(s). |
|
|
Del |
Delete the selected feature(s). |
|
Copy |
Ctrl+C / Ctrl+X |
Copies the selected feature(s). |
|
Paste |
Ctrl+V |
Pastes a copy of the selected feature(s). |
|
Multi-Select |
Shift+Click |
Select Multiple objects by clicking on features while holding shift. |
 minute read