Signals
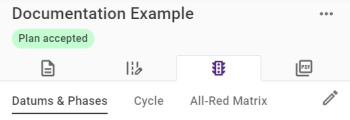
To generate Signals for a plan, select the Signals tab for an accepted plan from the Plan panel.
Note: When creating Signals for a Plan it is recommended to be familiar with ARTSM Guidance.
There are three sections, Datums & Phases, Cycle, All-Red Matrix.
Datums & Phases
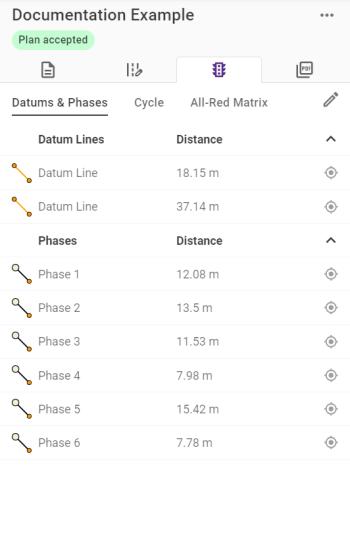
Click the Edit button ![]() to open the Signal feature editor. The plan features will appear on the map to help with positioning but will be transparent.
to open the Signal feature editor. The plan features will appear on the map to help with positioning but will be transparent.
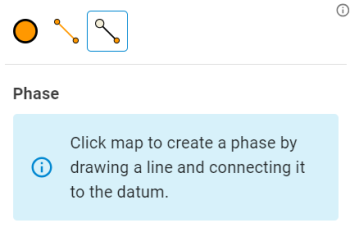
There are three feature types that can be placed to create the signalling set up needed to configure the Cycle and All-Red Matrix sections.
These are all added similarly to line and point features when Editing Plans. Both Datum Lines and Phases show their length from end to end.
Signal Features
|
Signal Feature |
Description |
|---|---|
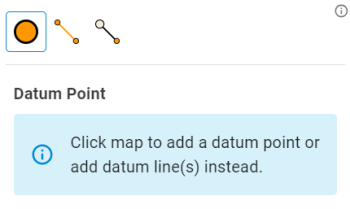
|
|
Where all Phases meet only at single point, a Datum point should be used. Note: Only one Datum Point can be placed. If a Datum point exists, it must be deleted before a Datum Line can be placed. |
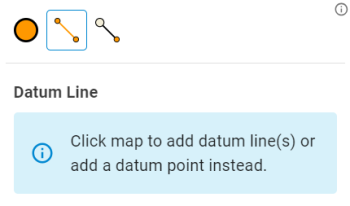
|
When not all Phases meet at a singular point, one or more Datum Lines will need to be used. Each Datum Line is added individually and consists of two nodes. Any Datum Line added after the first can be connected to another Datum Line's node. Datum Lines are treated as individual features even when connected, and can be edited and moved independently of any linked Datum Lines. Note: All Datum Lines must be deleted before a Datum Point |
|
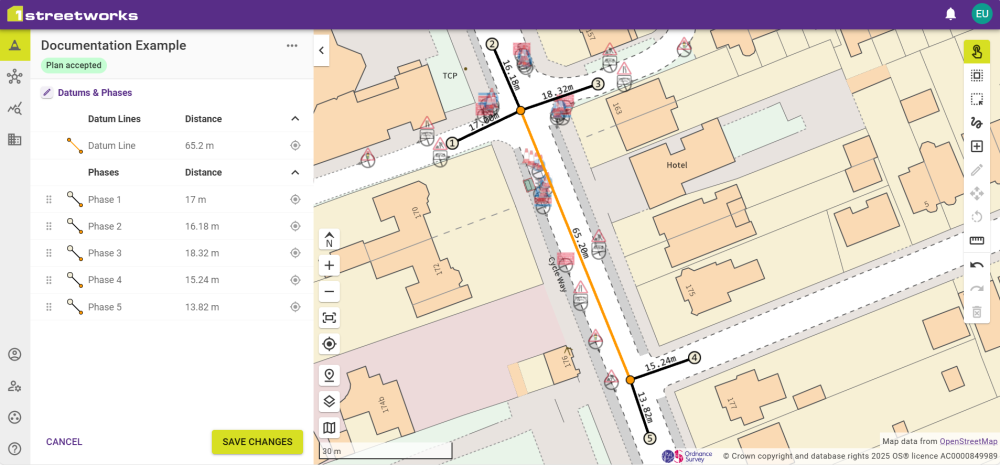
Once a Datum Point or at least one Datum Line exists, Phases can be added. One Phase should exist for every route that enters the traffic works area. These can be added by in any order by clicking an appropriate point on the plan, and then clicking the relevant Datum Point or node on a Datum Line. Note: Phases should be added clockwise from the expected starting Signal Cycle's expected starting point but can be reordered after placement to correct the ordering. |
To save your changes, click Save Changes in the Editing panel.
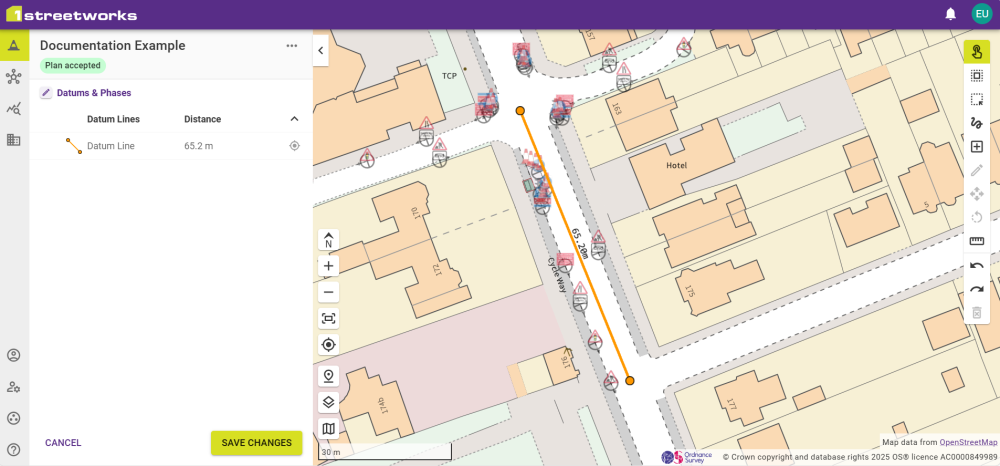
Examples
Datum Lines
Phases
Cycle
Once the plan has Signal Features, a Cycle can be created to set cycles and stages for the different phases for the Traffic Lights.
By clicking the Auto-populate Signal Cycle button ![]() , the signal stages can be automatically generated. The Traffic Stage Duration (seconds) can be set as a base time for stages to work from and the same can be done for pedestrians by ticking the Generate pedestrian stages and filling in the Pedestrian Stage Duration (seconds).
, the signal stages can be automatically generated. The Traffic Stage Duration (seconds) can be set as a base time for stages to work from and the same can be done for pedestrians by ticking the Generate pedestrian stages and filling in the Pedestrian Stage Duration (seconds).
Note: If a Pedestrian Crossing exists in the plan, Generate pedestrian Stages should be selected automatically.

Click Populate Cycle to create the necessary stages.
Stages can also be added manually by clicking the Add Stage button ![]() , and choosing either Traffic or Pedestrian.
, and choosing either Traffic or Pedestrian.
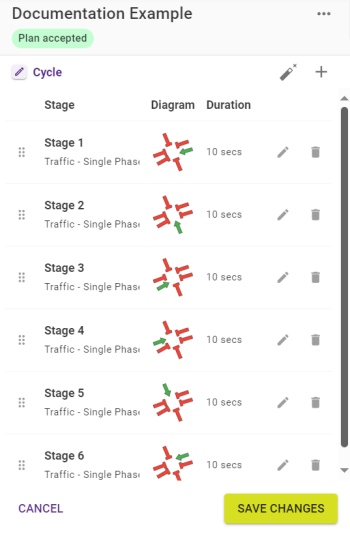
Stages show a diagram of the Phases with each phase showing an accurate angle compared to in comparison to the full cycle. Each phase is show as green if active or red if inactive during the current stage.
Each stage can then be configured by clicking the Edit Stage button ![]() or deleted with the Delete Stage button
or deleted with the Delete Stage button ![]() .
.
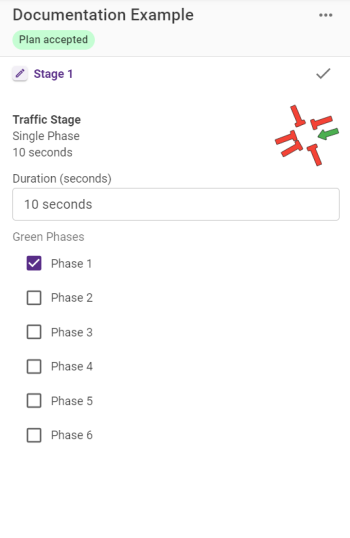
Stages can be edited to change the duration and to choose which phases are active during that stage.
Once a stage is configured, click the Finish Editing button ![]() to confirm the changes to the stage.
to confirm the changes to the stage.
To save all Cycle changes, click Save Changes in the Editing panel.
All-Red Matrix
The All-Red Matrix shows the duration that all lights are red for between stages.
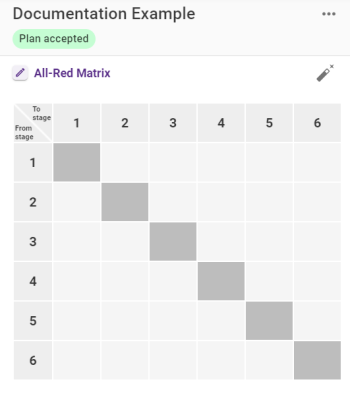
Each field can be configured by clicking the Edit all-red matrix button ![]() .
.
As an alternative to manually adding a duration to each stage change, the Auto-populate all red matrix button ![]() can be clicked to open the Auto-populate all-red matrix panel.
can be clicked to open the Auto-populate all-red matrix panel.
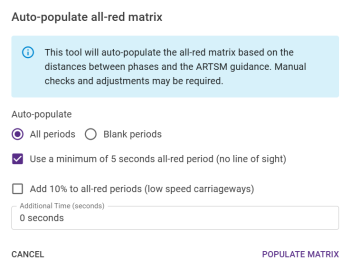
All periods is selected by default, which will overwrite any populated values if Auto-populate is confirmed. Choosing Blank periods will only populate any remaining blank values, preventing any existing values from being overwritten.
The option Use a minimum of 5 seconds all-red period (no line of sight) is chosen by default to ensure all-red periods are never less than 5 seconds long.
Additional time can be added with both the Additional Time (seconds) field and the option Add 10% to all-red periods (low speed carriageways). The 10% is calculated first, so the duration is further extended only by the exact additional time requested.
Click Populate Matrix to create the necessary stages.
Auto-populated values can be manually edited after being populated.
Click Save Changes to save the All-Red Matrix values.
 minute read