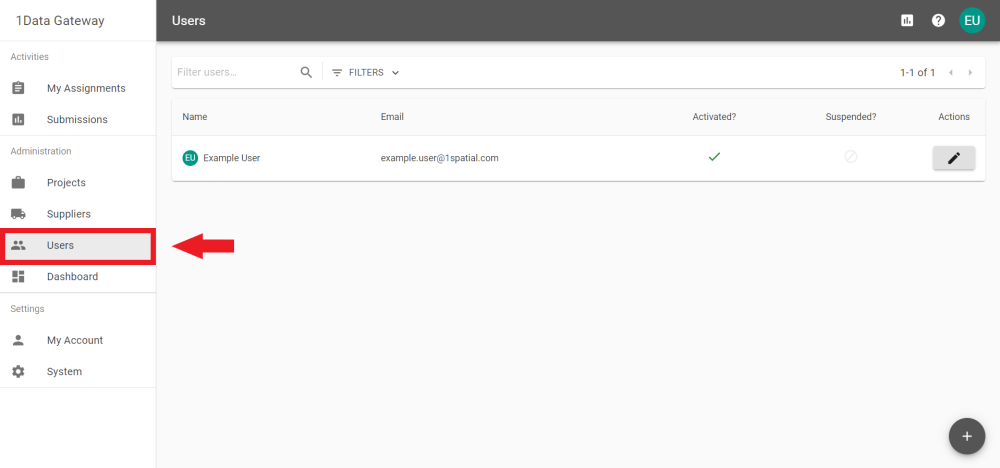
Users
The Users tab is used to manage a User's permissions or to add individual Users manually. For adding multiple Users, please read User Import.
 Add User
Click the ![]() icon to add a User.
icon to add a User.
Fill in their Name and Email, and click the ![]() button.
button.
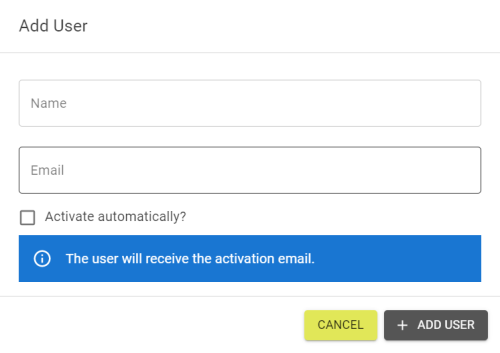
Note: Selecting the Activate automatically checkbox will automatically verify the account creation and send a welcome email instead.
Editing a User
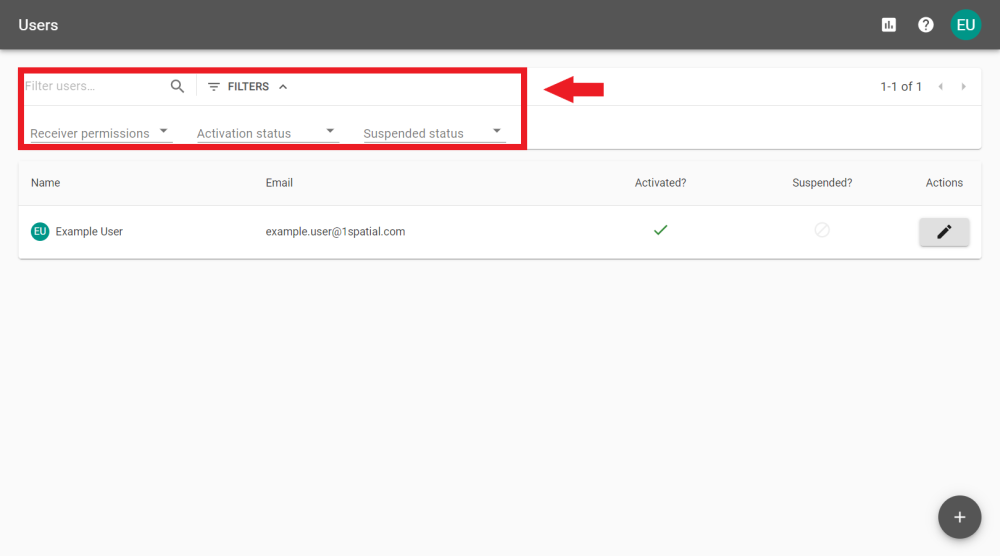
Find a User by searching or filtering the results.
Click the ![]() icon to edit a User and change settings in one of the following tabs.
icon to edit a User and change settings in one of the following tabs.
-
Status
-
Profile
-
Permissions
-
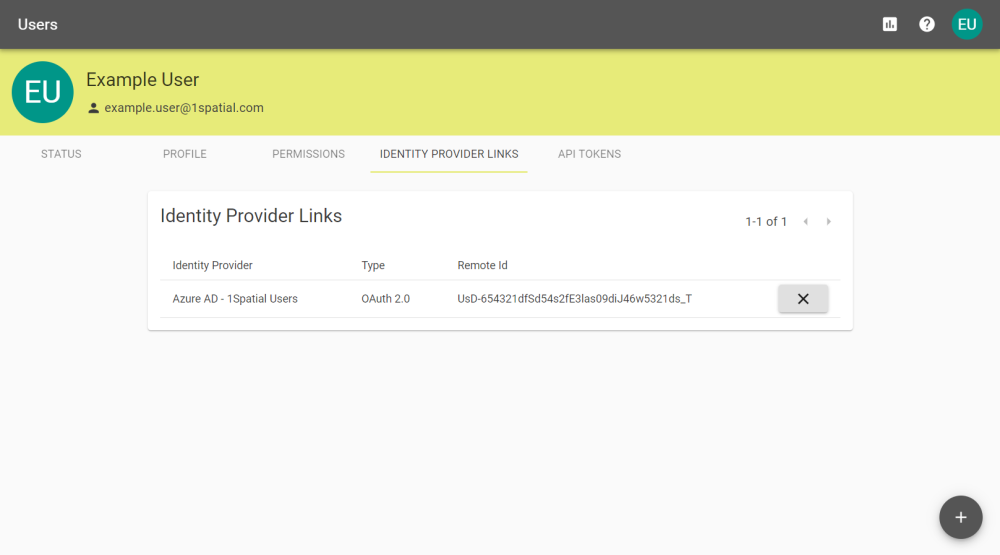
Identity Provider Links
-
API Tokens
The Status tab shows some details about the User's account and can be used to reset a User's password or suspend the User if necessary.
Note: If Users are managed via LDAP![]() Lightweight Directory Access Protocol then suspensions must be managed on the LDAP server.
Lightweight Directory Access Protocol then suspensions must be managed on the LDAP server.
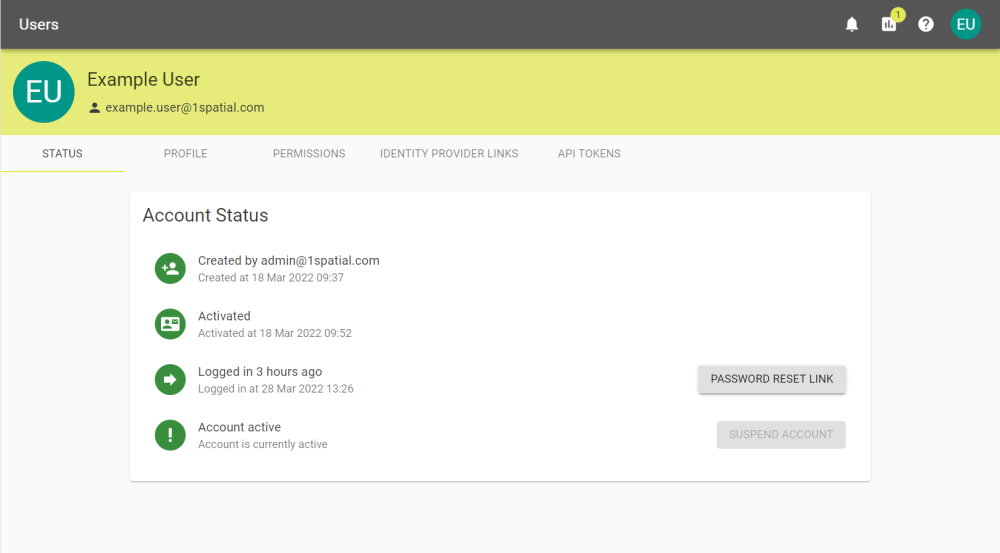
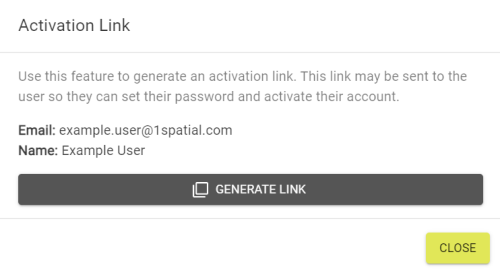
If a User has not been activated, Administrators can create an activation link or resend the activation email.
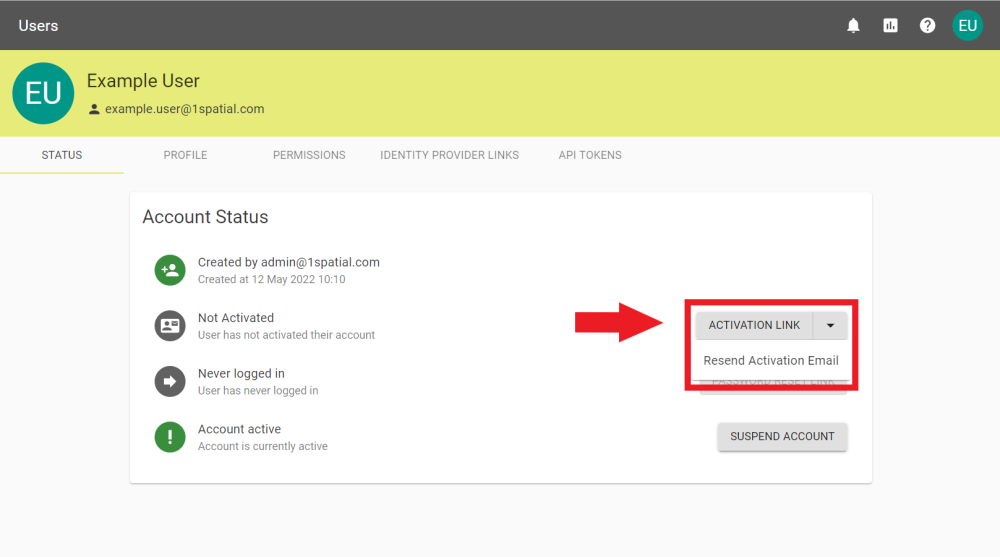
Clicking Activation Link and clicking the ![]() button in the popout will create a Link that can be sent to a User.
button in the popout will create a Link that can be sent to a User.
The User's Name and Email can be edited in the Profile tab unless the User is managed by LDAP.
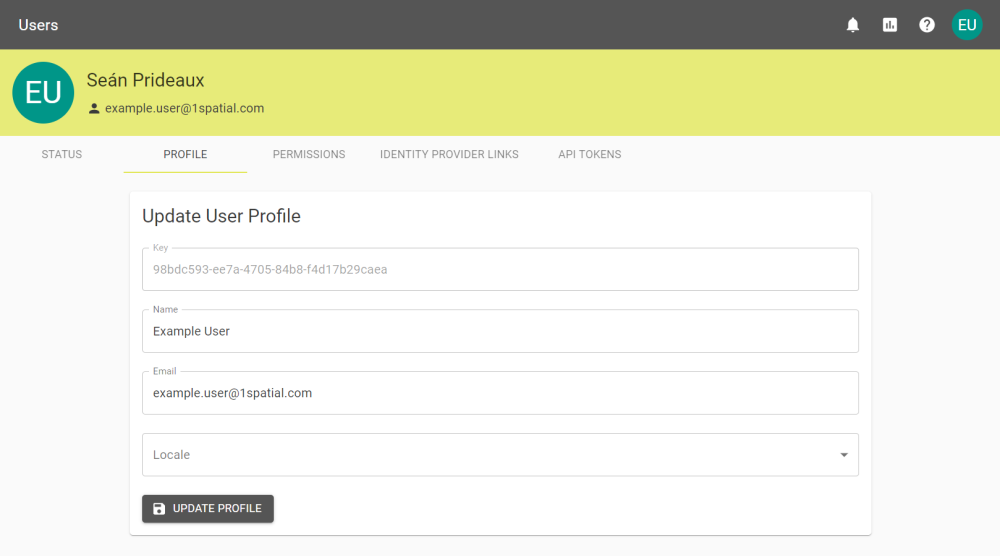
The Locale can be set to change the language of 1Data Gateway for the User. It is set to Browser Default initially but can be set to English (US or UK), Spanish (Spain), or Welsh (UK).
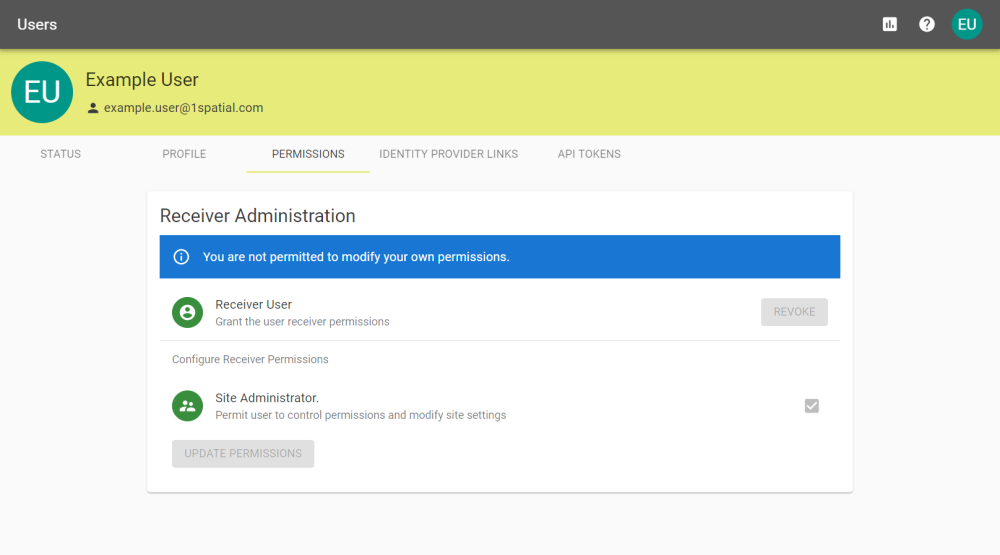
Permissions can be granted or revoked from the Permissions tab.
Note: Only Receiver and Site Administrator permissions are set here, Supplier supervisors are set on the Suppliers.
Identity Provider Links are required when using an external Identity Provider.
Add an Identity Provider Link by clicking the ![]() icon.
icon.
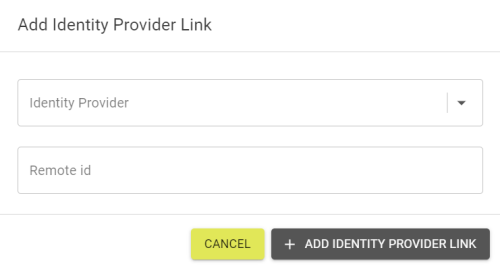
Choose the Identity Provider from the drop down, add the Remote ID, and click ![]() icon.
icon.
API Tokens are necessary for authentication of the API endpoints. For information on creating API Tokens, visit the API Docs page.