Configure Mapping
-
1Data Gateway will attempt to map each field with values in the source data. If it succeeds you will see:
- Orange banners are warnings but do not prevent the user from continuing the submission.
- Red banners warn of unmapped data that needs to be mapped before the submission can proceed to the next stage.
-
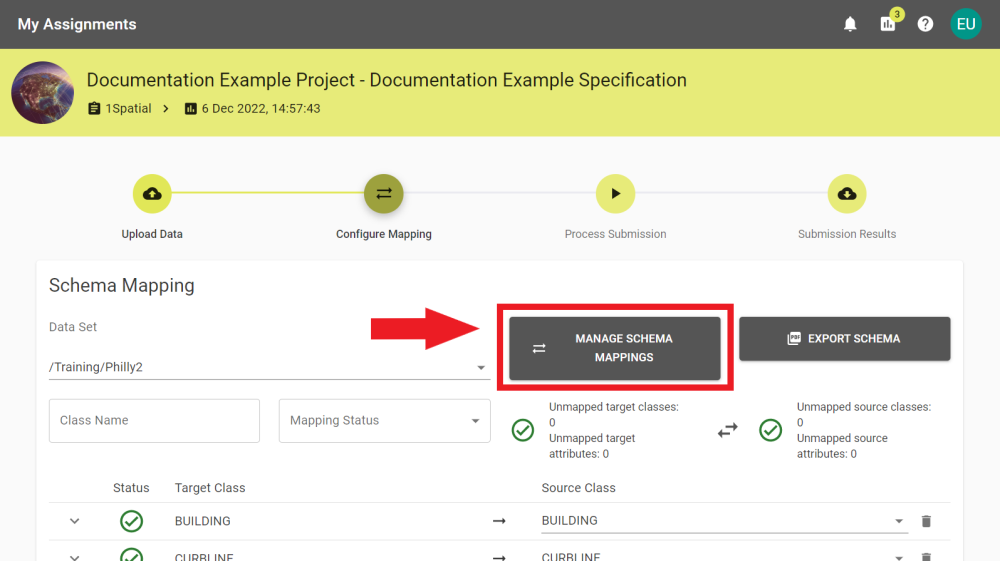
1Data Gateway will have attempted to create mappings. If it managed to configure it automatically you will see something like the screen below after clicking Review Mapping.
- Source Classes / Source Attributes are derived from the data uploaded by the user. Selecting a Source Class will populate the Source Attributes.
- Target Classes / Target Attributes are derived from the schema set in the portal. Choosing a Target Attribute in the right-hand column will map the source attribute to that target attribute.
-
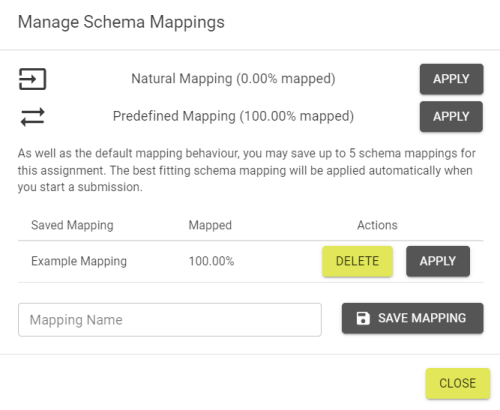
There are three sets of mappings:
-
Natural Mapping: Automatically created mapping based on source and target class/attribute names.
-
Predefined Mapping: Applied if mapping has already been defined by an Administrator during the set up of the specification.
-
Saved Mapping: A mapping previously saved by the user. Up to five mappings can be created and saved.
-
Once the mappings are all assigned make sure to click Apply for the mapping to be saved.
-
Select Continue to proceed to Process Submission. Alternatively, select the ellipsis on the right side of the button to open the automation / notification options.
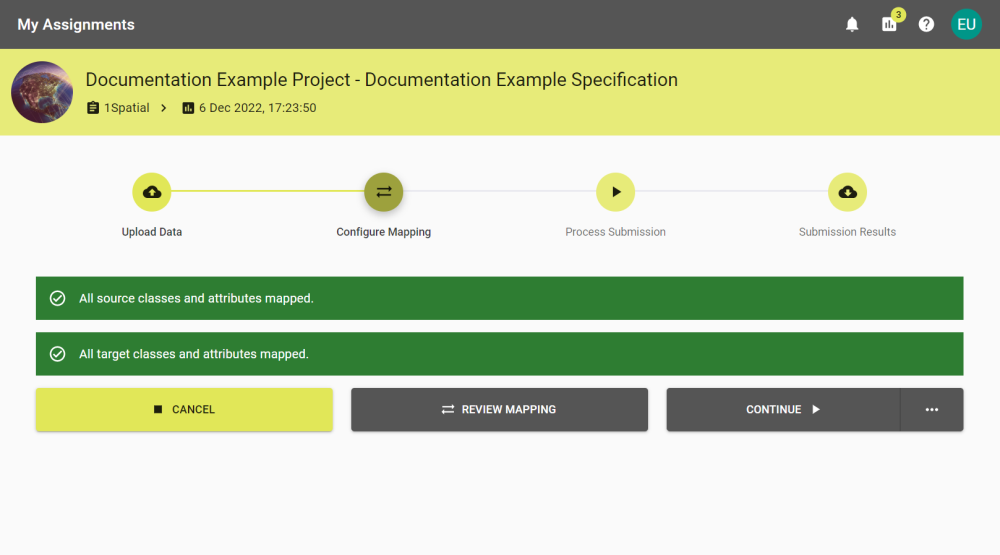
Once the upload is complete you should see the Configure Mapping screen.
If no data was chosen the Configure Mapping screen will look like the following.
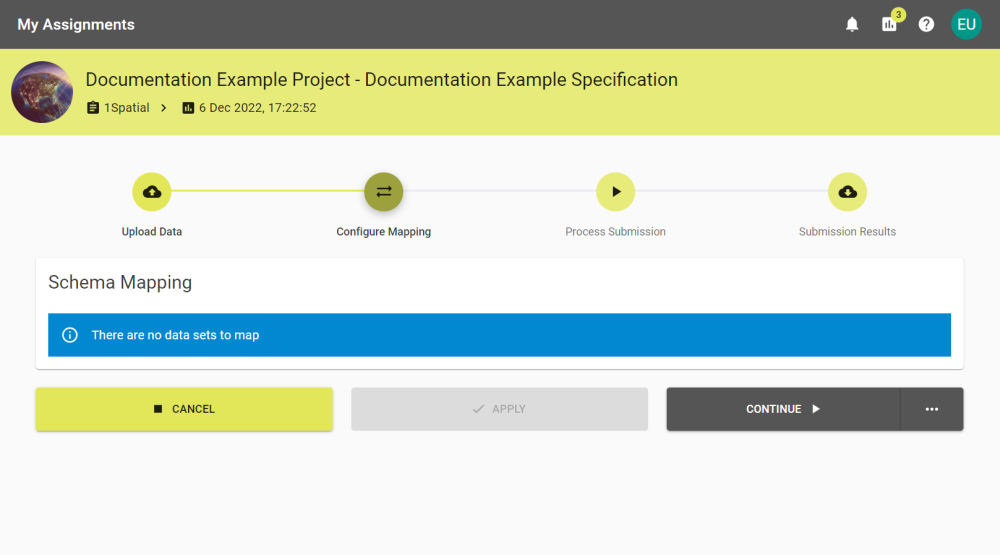
If there is no data to map, either click Continue or set an Automation![]() Submissions with automation set up will run to the requested stage without further interaction. method to proceed.
Submissions with automation set up will run to the requested stage without further interaction. method to proceed.
Follow the steps below to understand mapping data sets.
If there are unmapped classes or attributes you will see a banner similar to one of the examples below:
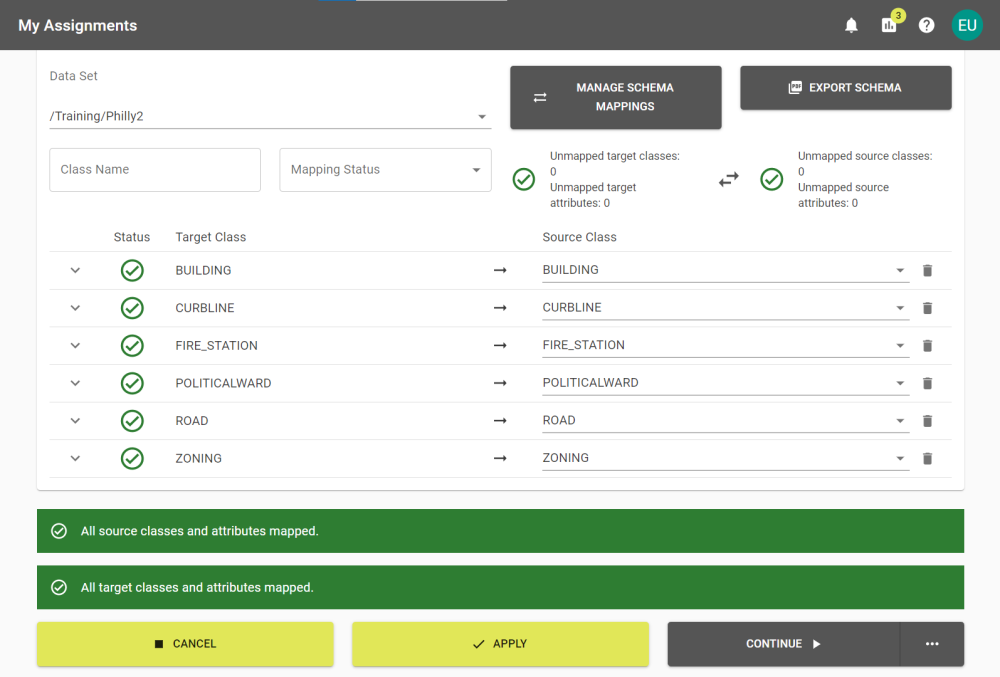
Schema Mapping takes a Source Class and maps it to a Target Class. These can be changed by clicking their drop down menus.
Clicking the ![]() button will toggle whether classes are mapped from "Source to Target" or "Target to Source".
button will toggle whether classes are mapped from "Source to Target" or "Target to Source".

Source and Target Attributes can also be edited. Clicking an attribute drop down menu brings up a full list of all available attributes.
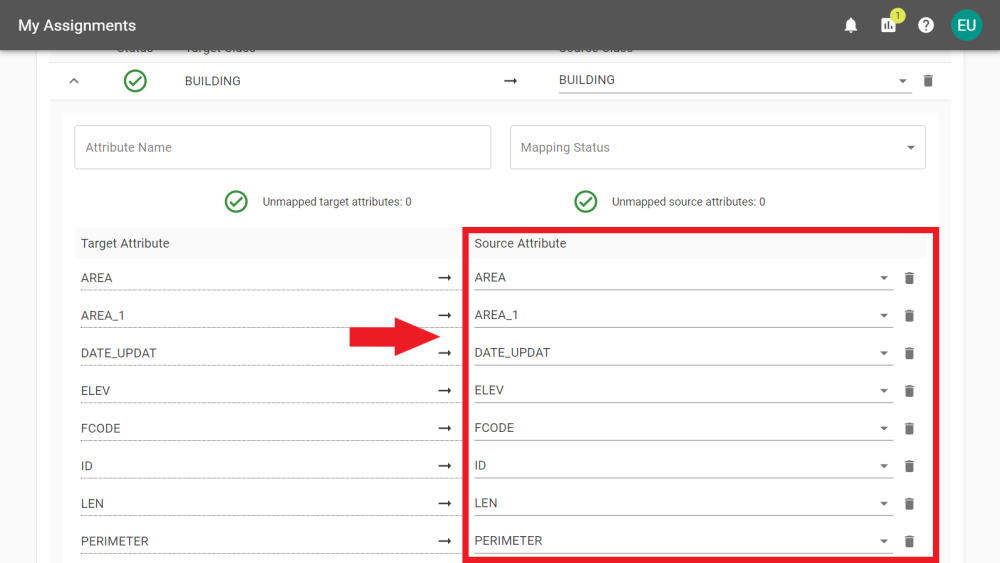
Target classes and attributes can be "removed" from a mapping by clicking the ![]() icon next to their drop down menu.
icon next to their drop down menu.
Note: Only one instance of a Source Attribute can be assigned as a Target Attribute.
Mappings can be saved, reset or loaded by clicking the Manage Schema button.
The current mapping configuration is what will be saved when Save Mapping is clicked. It does require a name to be saved.
Even if Schema Mapping is not allowed, the Schema can be exported to a PDF for download.
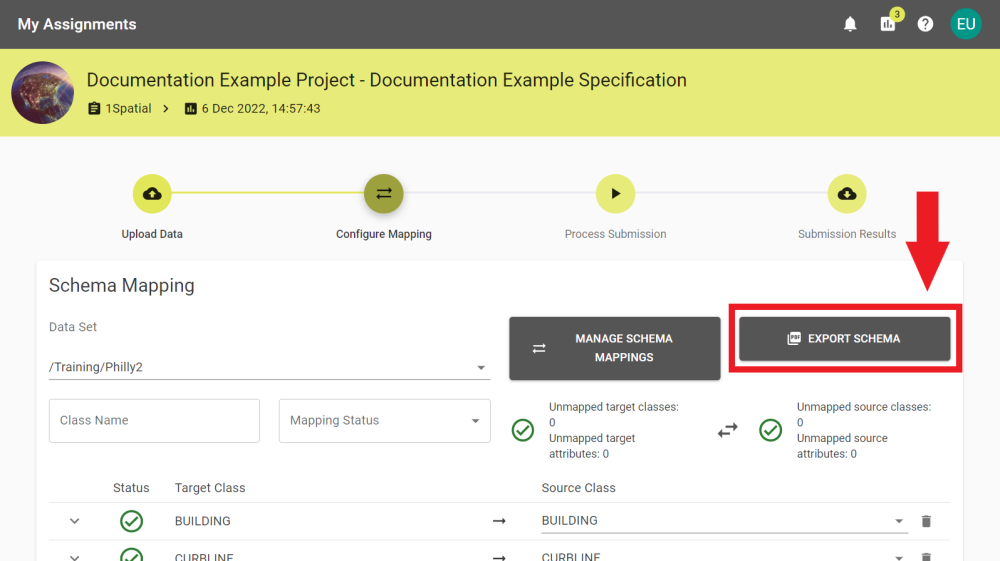
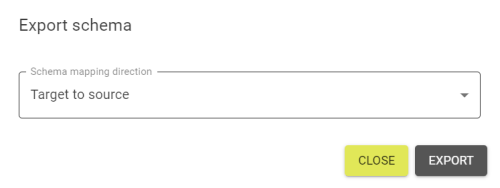
Click Export Schema to bring up the Export Schema popout, then use the dropdown to select whether the mapping should be generated as Target to source or Source to target.
Note: Unless the project allows unmapped properties, all attributes and classes must be mapped before you can continue with the submission. Continue will remain greyed out while you cannot progress.
Note: For more information, visit the Notifications page.