Read and Commit
In Read and Commit, the Source refers to the Data Store's Schema, while the Target is the Session's Schema. When committing, these are read in reverse so that the data is committed back to the Data Store.
1Integrate supports complex attributes such as arrays, references, and composite structures, but loading data using those structures is less common as it depends on the data formats and the specific Data Store's capabilities.
Creating Read and Commit Mappings
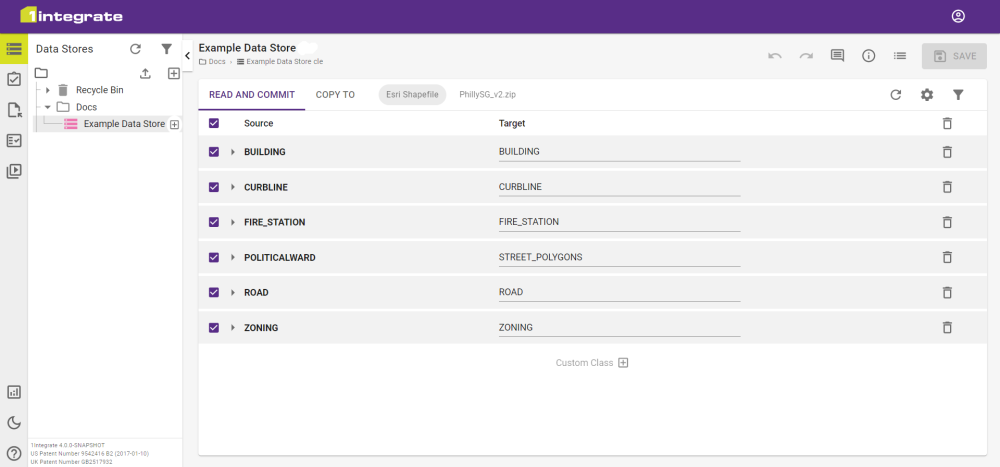
After configuring a Data Store, you can automatically add mappings by clicking the ![]() button if they aren't already populated. This can be further customised by selecting/deselecting existing classes and attributes, and by adding custom classes and attributes where necessary.
button if they aren't already populated. This can be further customised by selecting/deselecting existing classes and attributes, and by adding custom classes and attributes where necessary.
You can override the name and type of each attribute (unless you are using an Ontology). By default, 1Integrate is populated with the same names as the external data source and the data types are selected based on the data type in external data source. 1Integrate also indexes geometry columns and the primary keys of the source data.
Only checked items will be used as part of the Schema, meaning only those classes and attributes will be analysed in 1Integrate.
Note: To map to an Ontology schema, Ontology must be selected from the Fixed Schema Types when configuring the Data Store. For further details, see Ontology.
![]() Read and Commit Mapping Toolbar Icons
Read and Commit Mapping Toolbar Icons
Primary Geometry
1Integrate supports multiple geometries for a class, but only one can be the primary geometry.
When you import the data into 1Integrate, you define the primary geometry. The primary geometry is always named "geometry" and no other attribute in a class can share the same name.
To set the primary geometry, right click the attribute and select Make primary geometry from the context menu.
This can also be cleared via the context menu, selecting Clear primary geometry.
Note: Names are case sensitive, so "Geometry" is a valid non-primary geometry name but not recommended for use.
The primary geometry is the indexed geometry for this class and is the one reported in non-conformance reports. Additional geometry attributes can also be loaded as secondary geometries, which are available to use in the rules but these are not indexed.
Note: Custom Classes require the geometry attribute to be added manually along with any other attributes. Naming the attribute "geometry" and assigning the Geometry class will lock the attribute from further editing.
Index Flags
Each attribute has an index flag (denoted by a Index toggle).
The Index flag determines whether or not the attribute is indexed by 1Integrate.
For optimum performance, index any attributes for which you want to define rules that will search for objects with a specific value for that attribute. It is recommended that you do not create an index for attributes that will not be queried within a Rule or Action.
By default, an index is created within 1Integrate if one already exists in the external data source.
Note: If an attribute is indexed, its value will be included in non-conformance reports even if the Reported flag is not selected.
Report Flags
Each attribute has a report flag (denoted by a Report toggle).
The Report flag determines whether or not an attribute is reported in the rule conformance results JSON and HTML reports (see Task Results).
Viewing Attribute Metadata
Each class contains attributes that also store metadata based on its type. To view the metadata of an attribute, hover over the ![]() that is next to the attribute name.
that is next to the attribute name.
Unique Keys
You can set Unique Keys for attributes in a class. With a Unique Key set, the attribute cannot be disabled.
To set or remove a Unique key, right click the attribute and select the option to set/remove the key.

By default, this will set to the unique key that has been defined in the source data (e.g. the primary key of a table from a database).