1Workflow provides a personalised interface for each system user, showing allocated jobs and job statuses, this is called the Worklist.
The Worklist can be accessed using 1Edit or a standalone web interface (http://[machine]:[port]/1sms).
Users require either the 1sms_admin or worker role in order to see the Worklist , and must be a worker in order to progress any jobs (see 1SMS Roles).
Note: 1sms_admin does not have any extra permissions on this page compared to worker.
The Worklist Interface
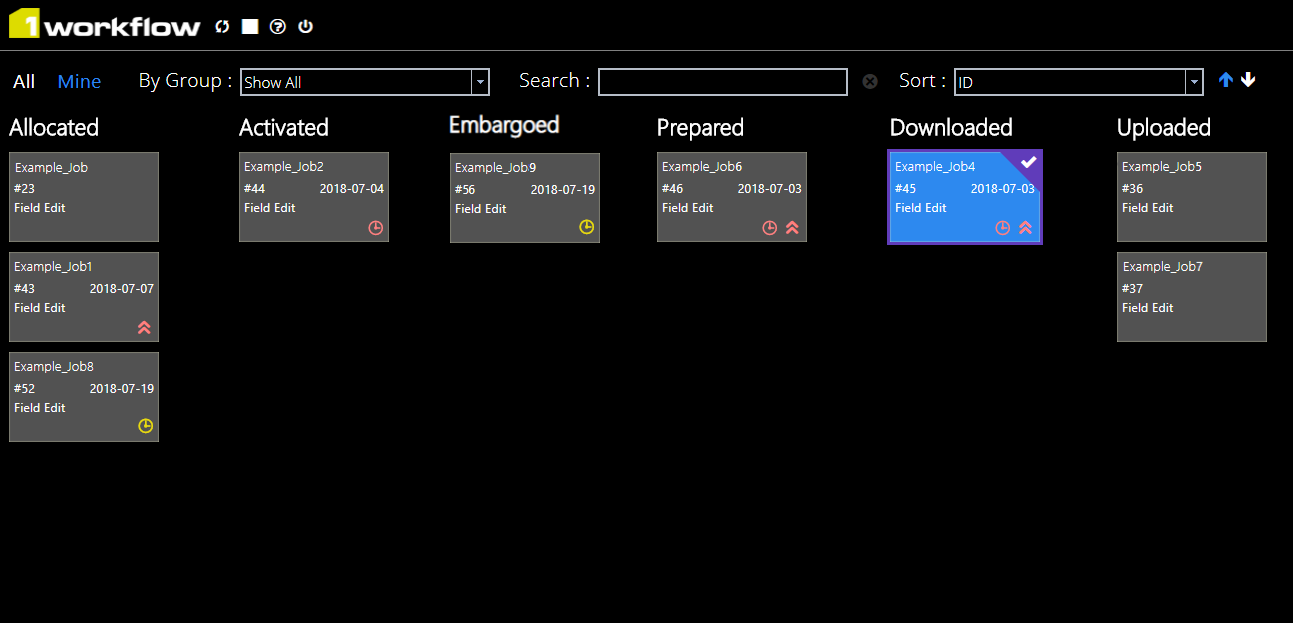
An overview of the Worklist interface
Jobs are grouped into columns according to their status:
- Allocated
- Activated
- Prepared
- Downloaded
- Uploaded
- Invalid
- Conflicted
- Quarantined
- Corrections Required
- Completed
Job Tiles
The Job Tiles display visual and textual information relating to the job. This includes the Job Name, Job ID, Planned End Date, Job type and Failure Type of the parent job.
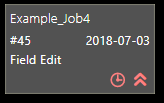
A job tile
To highlight important information, tiles display a number of icons:
- A clock icon will display yellow when the Planned Start Date has passed.
- A clock icon will display red when the Planned End Date has passed.
- The priority icon denotes which jobs are set to High Priority.
Select a job to view further information. This will be displayed in a job panel to the right of the interface.
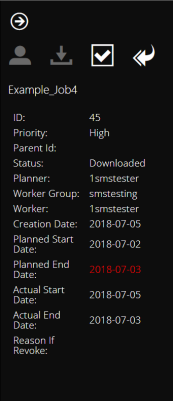
The Job information sidebar
The buttons displayed at the top of the job information panel depend on the status of the selected job. These buttons allow you to progress a job through its lifecycle.
Note: Jobs are created and allocated in 1Plan (see Creating Jobs and Editing, Allocating and Revoking Jobs). They can only be deleted and revoked using the 1Plan interface.
Visibility, Filtering and Searching Jobs
The View Settings bar lets you organise the Worklist and Job Tiles by filtering by Group, searching for jobs and sorting by a selected attribute.

The View Settings Bar
Filter By Group
The "By Group" filter can be used to limit which jobs are visible within the Worklist.

Filter "By Group"
Groups are used to collect user accounts into manageable units, and are controlled in an LDAP server such as Windows Active Directory (see the Microsoft documentation for further information).
When jobs are created in 1Plan, they can be assigned to either an individual user or a group of users.
As groups are hierarchical, users can belong to more than one group. Any groups that the current user belongs to appear in the By Group filter list. Selecting a group filters the worklist to only display jobs available to that particular group.
Example: User Groups
We might have a group "Engineering" that also contains two sub-groups "Development" and "Test", with users in each of these groups as pictured below.
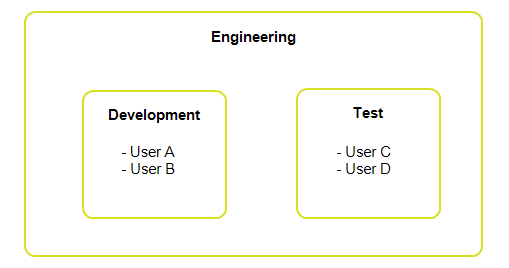
Example User Groups
-
If a job is assigned to "Engineering", Users A, B, C and D will be able to see it, and it will appear in the "Engineering" group filter.
If the users select their sub-group filter ("Development" or "Test") it will be filtered out.
-
If a job is assigned to "Development", only Users A and B will be able to see it, and it will appear in the "Development" group filter.
If the users select the group filter "Engineering" it will be filtered out.
-
If a job is assigned to "Development" and then User A activates it, only User A will be able to see it.
If User A selects the group filter "Engineering" it will be filtered out.
The Search Bar
The Search Bar can be used to display job(s) dependent on your search entry.

The Search bar
The Search functionality is limited to information that displays on the Job tiles: Job ID, Name, Type, Panned End Date and Failure Type.
Sort Jobs
The Sort filter can be used to order Jobs within each column based on the selected attribute, the jobs can subsequently be ordered in ascending or descending order by using the arrows next to the attribute box.
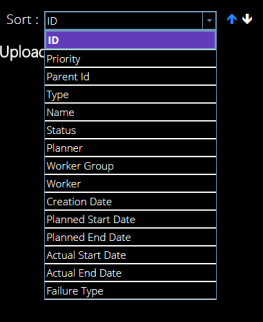
Sort filter options
Note: Any jobs currently activated by a user will only be visible to the particular user that activated it. No role exists that can see all jobs, including any currently activated by other users.